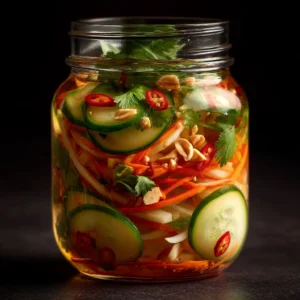
Unlock a world of bright, tangy, and irresistibly crunchy flavor with this stunning Vietnamese Vegetable Pickle recipe. Known as Đồ Chua, this condiment is a feast for the eyes, capturing the essence of vibrant colors and textures in a clear glass mason jar. The dramatic contrast of shredded carrots, crisp daikon radish, cool cucumbers, and fiery red chili peppers creates a visual masterpiece that promises an explosion of flavor in every bite.
This recipe is more than just a condiment; it’s a transformative element that can elevate countless dishes. We’ll guide you through creating that perfectly clear pickling liquid and achieving the ultimate crunch that makes this pickle a staple in Vietnamese cuisine and beyond. Get ready to add a jar of pure, colorful magic to your culinary repertoire.
 Recipe 1")
Why This Pickle Recipe Will Be Your New Favorite
Here’s what makes this Vietnamese vegetable pickle recipe stand out, delivering on both the stunning visuals and the authentic, sharp flavor you crave:
- Visually Stunning: Following our method results in a jewel-toned mix of vegetables suspended in a crystal-clear brine, exactly like the dramatic, focused food photography that inspires it.
- Incredibly Crunchy Texture: We use specific techniques to ensure your carrots, daikon, and cucumbers retain a satisfying snap for weeks.
- Perfectly Balanced Flavor: The pickling liquid is a masterful blend of sweet, sour, and salty, creating a harmonious taste that complements rather than overpowers your main dishes.
- Endlessly Versatile: This isn’t just for Banh Mi. Use it to liven up rice bowls, tacos, grilled meats, and salads for a burst of freshness.
The Building Blocks of Your Vibrant Pickle
Each ingredient is chosen not just for flavor, but for its contribution to the final texture and vibrant color. Here’s what you’ll need to create this masterpiece.
For the Pickled Vegetables:
-
Daikon Radish: 1 lb (450g), peeled and julienned. This provides the classic peppery bite and signature crunch that is essential to authentic Đồ Chua.
-
Carrots: 1 lb (450g), peeled and julienned. The carrots bring a subtle sweetness and a brilliant orange hue that contrasts beautifully with the other ingredients.
-
English Cucumber: 1 medium, thinly sliced. Its firm flesh and minimal seeds ensure it stays crisp and doesn’t water down the brine.
-
Red Chili Peppers: 2-3 Thai chilies, thinly sliced. These are for visual appeal and a gentle, warming heat. Adjust the amount based on your preference for spice.
For the Clear Pickling Brine:
-
Water: 2 cups (480ml). The neutral base of our pickling liquid, allowing the other flavors to shine through.
-
Distilled White Vinegar or Rice Vinegar: 2 cups (480ml). This is the acidic workhorse. Using a clear vinegar is critical for achieving that pristine, transparent look.
-
Granulated Sugar: 1 cup (200g). Sugar balances the vinegar’s sharpness, creating the classic sweet-and-sour profile.
-
Kosher Salt: 2 tbsp (30g). Salt not only seasons the pickles but also helps draw out excess water from the vegetables, ensuring they stay crunchy.
For the Finishing Garnish:
-
Fresh Cilantro: A handful of fresh sprigs. Added just before serving, it provides a fresh, herbaceous aroma and a pop of green.
-
Roasted Peanuts: ¼ cup (35g), roughly chopped. This adds a final layer of savory flavor and a delightful, unexpected crunch.
Essential Tools for Perfect Pickles
You don’t need fancy equipment, but these tools will make the process much easier and help you achieve that professional, picture-perfect result.
- Large Glass Jar: A 32-ounce (approx. 1-liter) glass mason jar with a tight-fitting lid is perfect for storing and admiring your creation.
- Julienne Peeler or Mandoline: This is the secret to getting those uniform, finely shredded carrots and daikon seen in the photos.
- Small Saucepan: For gently heating the brine to ensure the sugar and salt dissolve completely.
- Sharp Knife: For slicing the cucumber and chili peppers with precision.
 Recipe 2")
Crafting Your Vietnamese Vegetable Pickle, Step-by-Step
Follow these steps closely to create a pickle that is as delicious to eat as it is beautiful to look at. We’ll focus on the sensory cues to guide you.
Step 1: Prepare the Vegetables for Maximum Crunch
In a large bowl, combine the julienned daikon and carrots. Sprinkle them with 1 tablespoon of the salt and toss to combine. Let them sit for about 20-30 minutes. You will notice water pooling at the bottom of the bowl; this is exactly what you want. This step is crucial for drawing out moisture and ensuring a super-crunchy final product. After resting, rinse the vegetables thoroughly under cold water and drain well, gently squeezing out any excess liquid.
Step 2: Create the Crystal-Clear Pickling Brine
While the vegetables are salting, prepare your brine. In the small saucepan, combine the water, vinegar, sugar, and the remaining 1 tablespoon of salt. Heat over medium heat, stirring occasionally. Your main visual cue here is transparency. Heat just until the sugar and salt have completely dissolved and the liquid is perfectly clear. You don’t need to bring it to a rolling boil. Remove from heat and let it cool down to room temperature.
Step 3: Assemble and Pickle Your Jar of Jewels
Now for the satisfying part. Tightly pack the rinsed and drained carrots and daikon, the sliced cucumbers, and the sliced red chili peppers into your large glass jar. Layer them to create a beautiful mosaic of color. Once packed, carefully pour the cooled pickling brine over the vegetables until they are completely submerged. The sound should be a gentle glug as the liquid fills the air pockets. Seal the jar tightly.
Step 4: The Patient Wait and Flavor Development
For a quick pickle, you can enjoy this after just one hour in the refrigerator. However, for the best flavor, let it marinate for at least 24 hours. This allows the brine to fully penetrate the vegetables, mingling the sweet, sour, and spicy notes into a cohesive, vibrant taste. The colors will become even more brilliant as they infuse.
Expert Tips for Pickling Perfection
- Don’t Skip the Salting Step: This initial salting and rinsing process is non-negotiable for achieving a snappy, crunchy texture in your final pickle.
- Cool the Brine Completely: Pouring hot brine over the vegetables will cook them slightly, resulting in a softer pickle. Patience is key for a crisp result.
- Keep Vegetables Submerged: Ensure all vegetables are fully under the brine to prevent spoilage and ensure even pickling. You can use a fermentation weight if needed.
- Julienne for Texture: While you can slice or chop the vegetables, a julienne cut provides the best texture and visual appeal, mimicking authentic preparations.
Storing Your Homemade Vietnamese Pickles
Your Vietnamese vegetable pickle can be stored in the sealed glass jar in the refrigerator. The flavors will continue to develop and meld over the first few days.
They will remain crisp and delicious for up to 3-4 weeks. After that, they will start to lose their signature crunch but will still be tasty.
Serving Suggestions to Brighten Any Meal
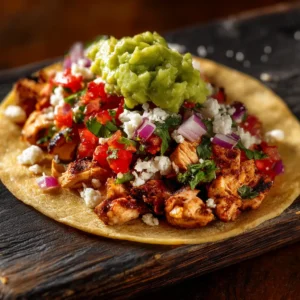
While a classic on Banh Mi sandwiches, this pickle is a versatile star. It adds a crunchy, acidic counterpoint that cuts through rich and savory flavors. Try it on top of some flavorful Chicken Street Tacos or to add excitement to a savory taco rice bowl. It also wonderfully complements the deep flavors of this easy beef and broccoli recipe. Don’t forget to garnish with fresh cilantro and chopped peanuts just before serving for that final layer of texture and aroma.
Frequently Asked Questions About Vietnamese Vegetable Pickle
Here are answers to some common questions to help you on your pickling journey.
While you can mix the brine cold, gently heating it is the fastest way to ensure the sugar and salt dissolve completely, which results in a perfectly clear and balanced liquid.
When stored in a sealed jar in the refrigerator, this Vietnamese vegetable pickle will stay crisp and delicious for 3-4 weeks. The flavor will continue to develop over time.
Vietnamese pickled carrots and daikon radish are called ‘Đồ Chua’ (pronounced doh choo-ah). It translates to ‘sour things’ and is a staple condiment in Vietnamese cuisine.
This recipe is very adaptable! You can experiment by adding other crunchy vegetables like thinly sliced jicama, bell peppers, broccoli stems, or even green beans.
The most common reason for soft pickles is skipping the initial salting step, which draws out excess water. Another reason could be pouring the brine over the vegetables while it’s still hot, which slightly cooks them.
Your Complete Recipe for Vietnamese Vegetable Pickle
Get ready to follow the detailed instructions below to make this vibrant, crunchy, and delicious condiment. It’s a simple process with a truly rewarding and flavorful result.
Vibrant Vietnamese Vegetable Pickle (Do Chua) Recipe
Ingredients
Equipment
Method
- In a large bowl, combine the julienned daikon and carrots. Sprinkle with 1 tablespoon of salt and toss. Let sit for 20-30 minutes to draw out moisture. Rinse thoroughly under cold water, drain, and gently squeeze out excess liquid.
- In a small saucepan, combine water, vinegar, sugar, and the remaining 1 tablespoon of salt. Heat over medium, stirring until sugar and salt are completely dissolved and the liquid is clear. Remove from heat and let cool completely.
- Tightly pack the rinsed vegetables, sliced cucumbers, and sliced red chili peppers into a large glass jar. Pour the cooled pickling brine over the vegetables until they are completely submerged.
- Seal the jar and refrigerate for at least 1 hour, but preferably 24 hours for the best flavor. Before serving, garnish with fresh cilantro and chopped roasted peanuts.
Notes
Cool the Brine Completely: Pouring hot brine over the vegetables will make them soft.
Keep Vegetables Submerged: Ensure all vegetables are fully under the brine to prevent spoilage.
Julienne for Texture: This cut provides the best texture and visual appeal.
Share Your Creations!
This Vietnamese Vegetable Pickle is a recipe we’re truly proud of, perfectly balancing beauty, flavor, and texture. We know it will become a staple in your kitchen!
If you make this recipe, we’d love to see it! Tag us in your photos on social media and be sure to save it to your favorite board on Pinterest. Your shares help us grow and bring more delicious recipes to everyone!
 Recipe 4")