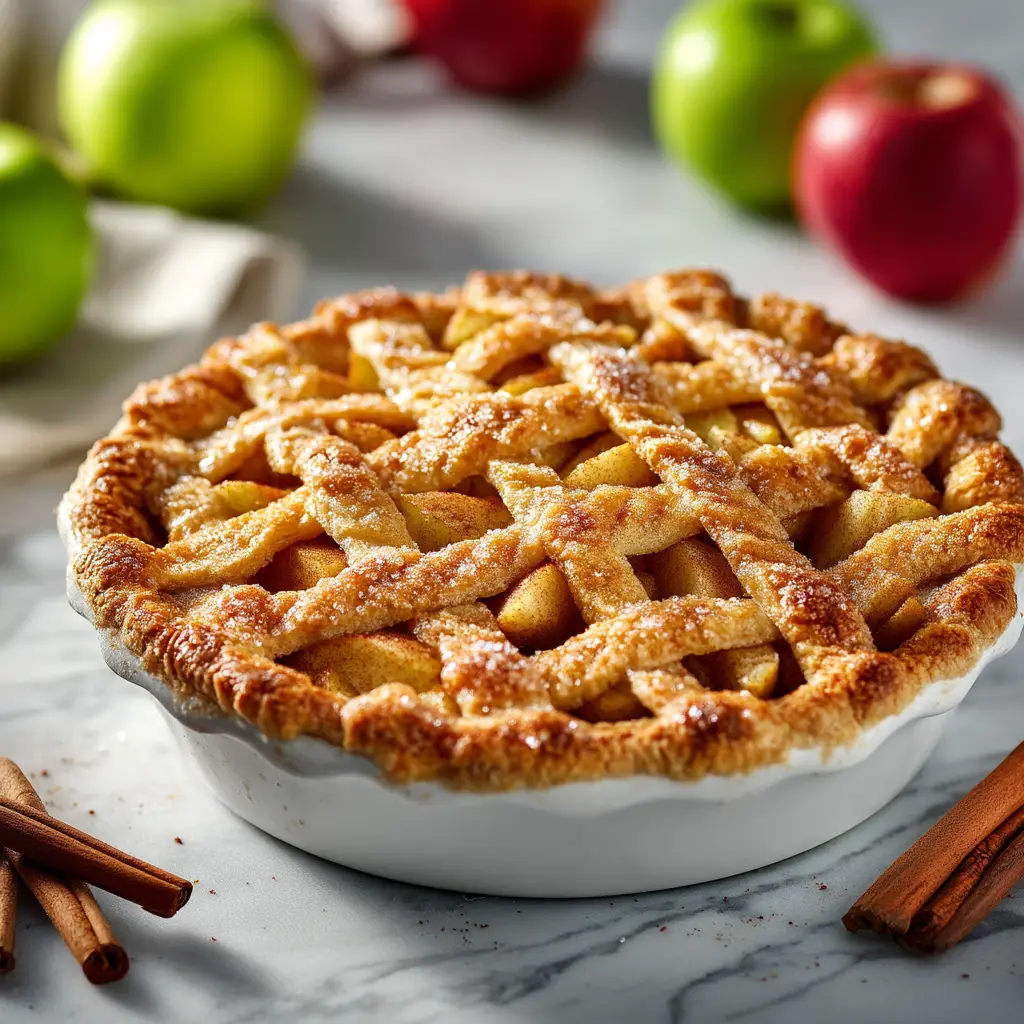
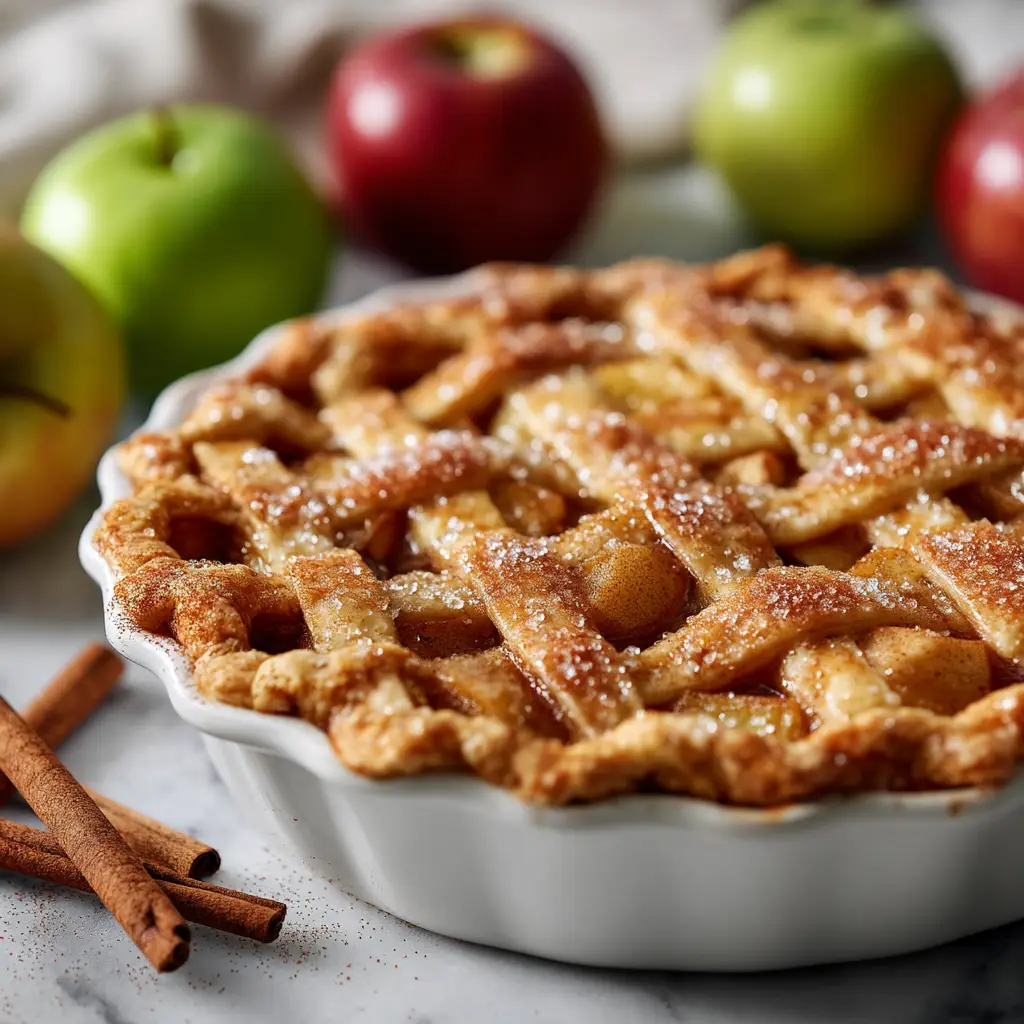
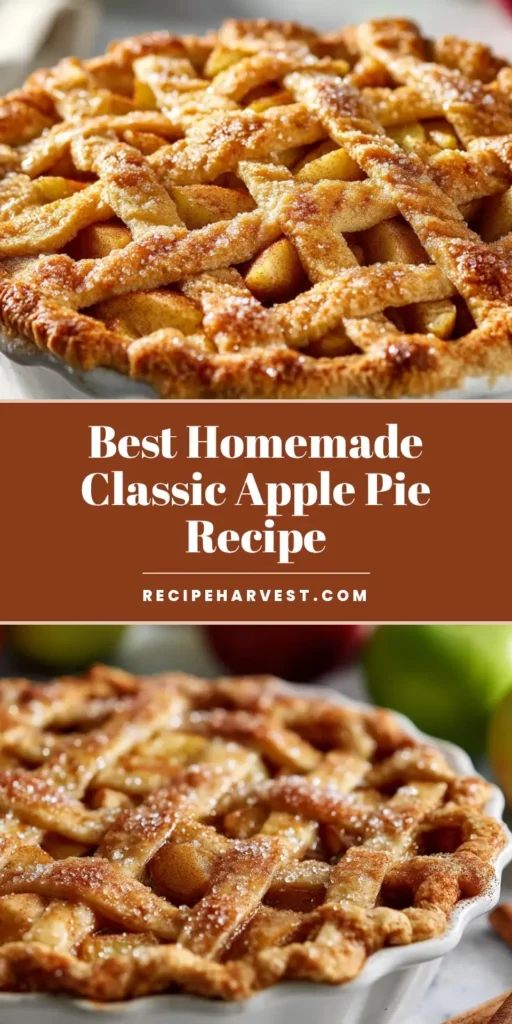
Welcome to the ultimate rustic Apple Pie Recipe, a timeless dessert that perfectly captures the essence of cozy, homemade baking. This isn’t just any apple pie; it’s the one you see in magazines, with a stunning golden-brown woven lattice crust sparkling with sugar and a tender, warmly-spiced apple filling that peeks through. The aroma alone will transport you to a place of comfort and warmth.
We developed this recipe to be foolproof, ensuring you achieve that picture-perfect result every single time. By using a mix of apples and a few key techniques, we guarantee a filling that’s tender but not mushy, and a crust that’s unbelievably flaky and buttery. Get ready to create a truly memorable dessert.
Why This Apple Pie Recipe Will Be Your New Favorite
This recipe is meticulously crafted to deliver on both visual appeal and incredible flavor. Here’s what makes it stand out:
- Picture-Perfect Lattice Crust: We’ll guide you step-by-step through creating a beautiful woven lattice that looks complex but is surprisingly achievable. It’s the key to that rustic, homemade charm.
- Incredibly Flaky Texture: Our all-butter crust recipe uses simple ingredients and cold temperatures to produce layers of flaky perfection that shatter with every bite.
- Balanced and Flavorful Filling: Using a combination of tart and sweet apples creates a dynamic, deeply flavorful filling that holds its shape beautifully after baking.
- Aromatic Spice Blend: The warm embrace of cinnamon is front and center, creating that classic, cozy apple pie experience everyone craves.
The Building Blocks of a Perfect Apple Pie
Every ingredient plays a critical role in achieving the perfect balance of flavor and texture. Here’s what you’ll need and why.
For The Flaky All-Butter Crust
All-Purpose Flour: Provides the structure for our crust. Keep it simple; no fancy flour is needed for this wonderfully tender result. 2 ½ cups (300g)
Unsalted Butter: The star of the show for flavor and flakiness. It must be very cold, cut into cubes, to create steam pockets as it bakes. 1 cup (226g)
Granulated Sugar: Just a touch of sugar adds flavor and helps with browning, creating that gorgeous golden hue. 1 tablespoon (15g)
Salt: Essential for balancing the sweetness and enhancing the rich butter flavor. 1 teaspoon (6g)
Ice Water: The key to keeping the butter cold and bringing the dough together without overworking it. You’ll use just enough to form a cohesive dough. ½ cup (120ml)
For The Tender Spiced Apple Filling
Apples: A mix of firm-tart apples like Granny Smith and firm-sweet apples like Honeycrisp or Braeburn is ideal. This combination ensures a filling that’s not overly sweet and holds its texture. About 8 medium apples (3 ½ to 4 lbs / 1.6-1.8kg), peeled, cored, and sliced ¼-inch thick.
Lemon Juice: Prevents the apples from browning while you prepare the crust and adds a crucial touch of brightness to balance the sweetness. 2 tablespoons (30ml)
Brown & Granulated Sugar: A mix of light brown sugar and granulated sugar provides a rich, molasses-tinged sweetness and the perfect consistency. ½ cup (100g) packed light brown sugar and ¼ cup (50g) granulated sugar.
All-Purpose Flour: Acts as our thickener, turning the apple juices into a luscious, syrupy sauce rather than a watery mess. ¼ cup (30g)
Ground Cinnamon: The quintessential apple pie spice, providing that signature warm and cozy aroma and flavor. 1 ½ teaspoons (4g)
Unsalted Butter: A few pats of butter dotted over the filling before adding the top crust enriches the sauce and adds a silky finish. 2 tablespoons (28g), cut into small pieces.
For The Finishing Touch
Egg Wash: A simple mixture of one large egg and a tablespoon of milk is the secret to a deep, golden-brown, glossy crust. It also helps the sugar topping adhere.
Coarse Sugar: Sprinkled generously over the lattice, coarse or Demerara sugar adds a beautiful sparkle and a delightful crunch. 2 tablespoons (30g)
Ground Cinnamon: A final dusting of cinnamon enhances the visual appeal and adds another layer of warm spice. ¼ teaspoon (1g)
Essential Tools for Your Apple Pie Journey
You don’t need a professional kitchen, but a few key tools will make the process much smoother and guarantee a beautiful result.
- 9-inch (23cm) pie dish (ceramic or glass is perfect)
- Large mixing bowl
- Pastry blender or your fingertips
- Rolling pin
- Sharp knife or pizza cutter
- Baking sheet
Crafting Your Rustic Apple Pie: A Step-by-Step Guide
Follow these instructions closely, paying attention to the sensory cues, to create a truly flawless homemade apple pie.
Step 1: Forge the Flaky Pie Crust
In a large bowl, whisk together the 2 ½ cups (300g) of flour, 1 tablespoon (15g) of sugar, and 1 teaspoon (6g) of salt. Add the cold, cubed 1 cup (226g) of butter. Using a pastry blender or your fingers, cut the butter into the flour until the mixture resembles coarse crumbs with some pea-sized pieces of butter remaining. These butter pockets are crucial for a flaky crust!
Gradually sprinkle in the ½ cup (120ml) of ice water, 1 to 2 tablespoons at a time, mixing gently with a fork until the dough just begins to come together. Do not overmix. Divide the dough into two discs, one slightly larger than the other, wrap them in plastic, and chill in the refrigerator for at least 1 hour.
Step 2: Prepare the Warmly Spiced Filling
While the dough chills, prepare your filling. Peel, core, and slice your apples about ¼-inch thick. Place them in a large bowl and immediately toss with the 2 tablespoons (30ml) of lemon juice to prevent browning.
In a separate, small bowl, whisk together the ½ cup (100g) brown sugar, ¼ cup (50g) granulated sugar, ¼ cup (30g) flour, and 1 ½ teaspoons (4g) cinnamon. Sprinkle this mixture over the apples and toss gently until every slice is evenly coated. Set aside and allow the apples to macerate, releasing their juices.
Step 3: Assemble Your Apple Pie Masterpiece
Preheat your oven to 400°F (200°C). Place a baking sheet on the lower rack to catch any potential drips. On a lightly floured surface, roll out the larger disc of dough into a 12-inch (30cm) circle. Carefully transfer it to your 9-inch pie dish, gently pressing it into the bottom and up the sides.
Spoon the apple filling into the crust, mounding it slightly in the center. Dot the top with the 2 tablespoons (28g) of butter pieces. Now, roll out the second disc of dough into an 11-inch (28cm) circle. Using a knife or pizza cutter, cut it into ten 1-inch (2.5cm) wide strips.
Step 4: Weave the Perfect Lattice and Bake to Golden Perfection
Lay five strips vertically across the pie. Fold back every other strip (the 1st, 3rd, and 5th). Place one long strip horizontally across the center and unfold the vertical strips over it. Now fold back the alternate strips (the 2nd and 4th) and lay another horizontal strip. Repeat this weaving pattern until the entire top is covered.
Trim any excess dough and crimp the edges to seal. Whisk together the egg and milk for the egg wash and brush it evenly over the lattice. In a small bowl, combine the 2 tablespoons (30g) of coarse sugar and ¼ teaspoon (1g) cinnamon, then sprinkle it all over the crust.
Place the pie on the preheated baking sheet. Bake for 20 minutes at 400°F (200°C), then reduce the oven temperature to 375°F (190°C) and continue baking for another 35-45 minutes. Your pie is done when the crust is a deep golden-brown and the filling is thick and bubbly. You should hear it sizzling!
Let the pie cool on a wire rack for at least 4 hours before slicing. This is crucial for the filling to set properly.
Expert Tips for a Flawless Apple Pie Every Time
- Keep Everything Cold: The secret to a flaky crust is cold butter and ice water. If your kitchen is warm, don’t hesitate to chill the dough between steps.
- Don’t Fear the Dark: A pale, sad pie is a flavorless pie. Bake until the crust is a confident, deep golden-brown for the best flavor and texture. If the edges are browning too quickly, cover them with foil.
- The Cooling Period is Non-Negotiable: Slicing into a hot pie will result in a soupy mess. Allowing it to cool completely lets the filling thicken and set for clean, beautiful slices.
- Mix Your Apples: Relying on just one type of apple can lead to a one-dimensional or mushy filling. The combination of tart and sweet apples is a game-changer.
Storing, Reheating, and Freezing Your Creation
Your beautiful apple pie can be stored, covered, at room temperature for up to 2 days or in the refrigerator for up to 5 days. To reheat, simply place a slice in a 350°F (175°C) oven for 10-15 minutes until warmed through.
You can also freeze the baked pie for up to 3 months. Let it thaw in the refrigerator overnight before reheating in the oven.
Perfect Pairings: What to Serve With Your Apple Pie
While this rustic apple pie is a showstopper on its own, a scoop of vanilla bean ice cream or a dollop of fresh whipped cream is classic. For a full dessert spread, it pairs wonderfully with other baked goods. After a savory meal like our One-Pot Creamy Garlic Pasta, a slice of this pie is the perfect ending. It also sits beautifully on a holiday table next to treats like Brown Butter Pumpkin Chocolate Chip Cookies or some festive Caramel Ritz Cracker Christmas Cookies.
Frequently Asked Questions About This Apple Pie Recipe
Absolutely! You can prepare the pie dough up to 2 days in advance and keep it wrapped in the refrigerator. The entire baked pie can be made a day in advance and stored at room temperature; the flavors will meld together beautifully.
Look for two main visual cues. The crust should be a deep, rich golden-brown, not pale. Most importantly, you should see the filling actively bubbling through the lattice openings. This indicates the pie is hot enough inside for the filling to have thickened properly.
There are three keys to avoiding a soggy bottom. First, make sure your apple filling isn’t overly watery. Second, bake the pie on a preheated baking sheet on the lower rack of the oven to ensure the bottom cooks quickly. Finally, bake until the filling is vigorously bubbling to ensure the thickeners have activated.
The best apple pies use a combination of apples. We recommend a mix of a firm-tart apple like Granny Smith, which holds its shape and provides acidity, and a firm-sweet apple like Honeycrisp, Braeburn, or Golden Delicious for a balanced, complex flavor.
Your Printable Guide to The Perfect Rustic Apple Pie
Here it is: the full, detailed recipe ready for your kitchen. We can’t wait for you to try it and fill your home with the incredible aroma of homemade apple pie.
Rustic Apple Pie Recipe with a Perfect Lattice Crust
Ingredients
Equipment
Method
- In a large bowl, whisk together flour, sugar, and salt. Cut in the cold butter using a pastry blender until mixture resembles coarse crumbs with pea-sized pieces of butter remaining.
- Gradually sprinkle in the ice water, mixing gently with a fork until the dough just begins to come together. Divide the dough into two discs (one slightly larger), wrap in plastic, and chill for at least 1 hour.
- In a large bowl, toss the peeled and sliced apples with lemon juice. In a separate small bowl, whisk together the brown sugar, granulated sugar, flour, and cinnamon. Sprinkle the sugar mixture over the apples and toss to coat evenly.
- Preheat oven to 400°F (200°C). Roll out the larger dough disc and fit it into a 9-inch pie dish. Spoon in the apple filling and dot with butter pieces.
- Roll out the second dough disc and cut into ten 1-inch strips. Weave the strips into a lattice pattern over the filling. Trim and crimp the edges.
- Brush the lattice with an egg wash (1 egg whisked with 1 tbsp milk). Sprinkle with a mixture of coarse sugar and cinnamon.
- Bake on a baking sheet at 400°F (200°C) for 20 minutes. Reduce heat to 375°F (190°C) and bake for another 35-45 minutes, until the crust is deep golden-brown and the filling is bubbly. Let cool completely (at least 4 hours) before slicing.
Notes
Don't Fear the Dark: Bake until the crust is a confident, deep golden-brown for the best flavor and texture. If the edges are browning too quickly, cover them with foil.
The Cooling Period is Non-Negotiable: Slicing into a hot pie will result in a soupy mess. Allowing it to cool completely lets the filling thicken and set for clean, beautiful slices.
Mix Your Apples: Relying on just one type of apple can lead to a one-dimensional or mushy filling. The combination of tart and sweet apples is a game-changer.
Share Your Masterpiece!
We are so excited for you to bake this rustic Apple Pie Recipe! It’s more than just a dessert; it’s an experience. If you make it, please leave a comment below and let us know how it turned out.
Don’t forget to save this recipe to your favorite board on Pinterest! Your shares help us grow and continue to bring you delicious, reliable recipes. Happy baking!