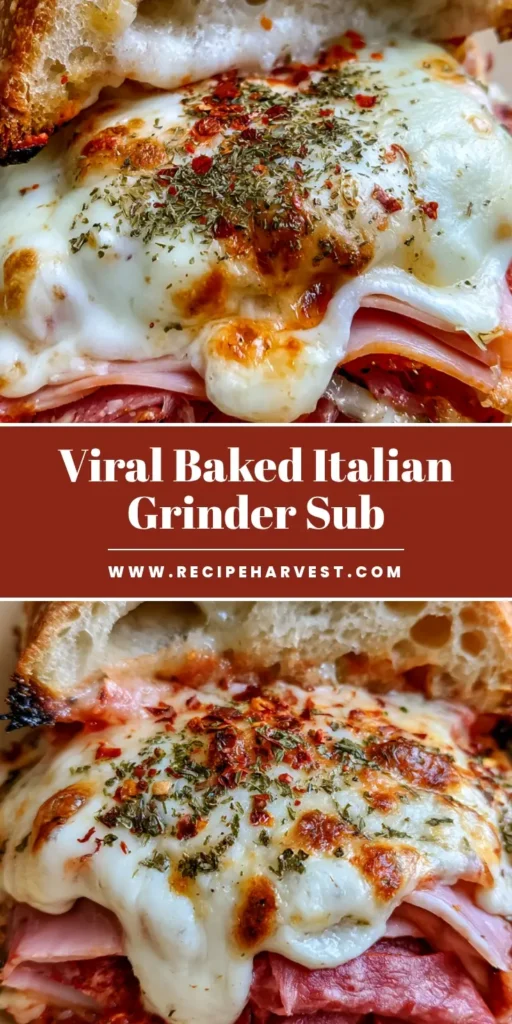
If you have been scrolling through social media lately, you know that the “Grinder” has taken the culinary world by storm. But while cold subs are great, these Baked Italian Grinder Sandwiches take the experience to a completely different level of comfort. Imagine a crusty, golden-brown sub roll toasted to perfection, layered with salty meats and topped with a thick, drooping blanket of melted mozzarella cheese.
The magic of Baked Italian Grinder Sandwiches lies in the contrast of textures. You get the crunch of the toasted bread, the savory richness of folded salami and ham, and that iconic “cheese pull” that only comes from a high-heat bake. It is the ultimate handheld meal for game days, busy weeknights, or a weekend indulgence that feels like it came straight from a high-end East Coast deli.
By baking these sandwiches, we allow the oils from the pepperoni and salami to slightly render, soaking into the crumb of the bread while the edges of the roll develop a slight, delicious char. It’s a sensory experience that starts with the aroma of dried oregano and crushed red pepper hitting the hot oven air and ends with a perfectly toasted, messy, and magnificent bite.
Why You Will Crave These Toasted Deli Masterpieces
- The Perfect Crunch: We focus on achieving a golden-brown bread crust with visible air bubbles that shatter when you bite into them.
- Triple Meat Threat: A heavy foundation of folded genoa salami, thin-sliced deli ham, and spicy pepperoni provides layers of salty, savory depth.
- The “Droop” Factor: A thick layer of melted bubbly mozzarella with toasted brown spots ensures every inch of the meat is covered in gooey goodness.
- Herb-Infused Heat: A generous sprinkle of dried oregano flakes and crushed red pepper cuts through the richness of the cheese.
- Better Than Delivery: Skip the soggy delivery sub and enjoy a sandwich that stays crispy from the first bite to the last.
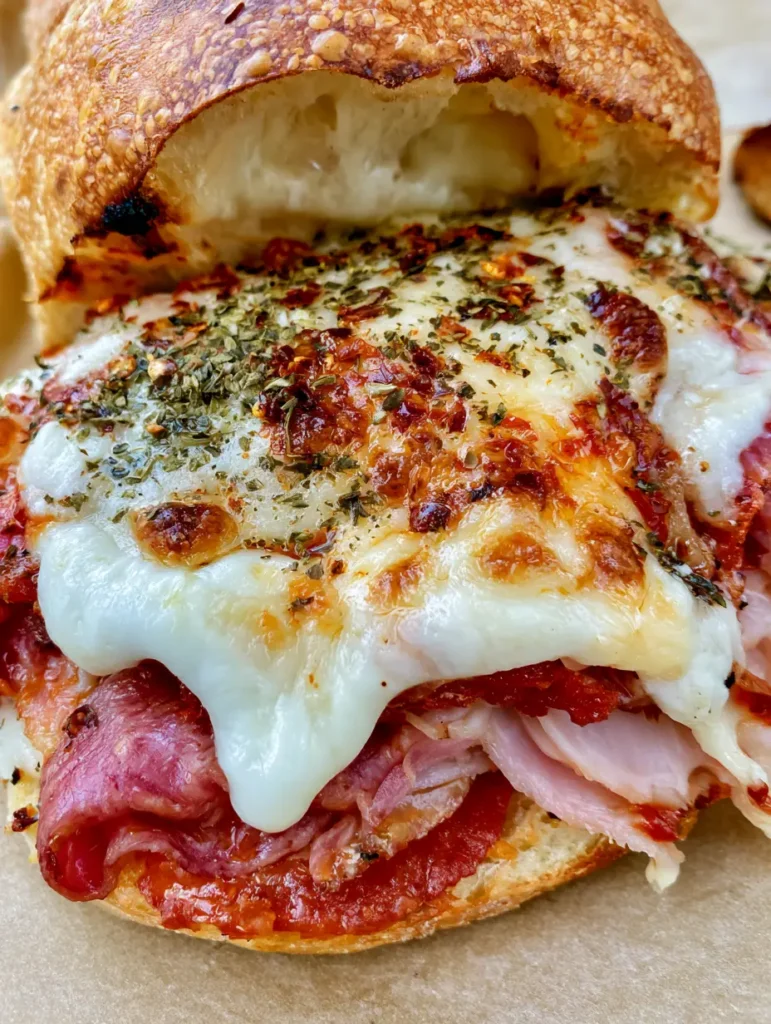
The Essential Ingredients for a Professional-Grade Grinder
To recreate the Baked Italian Grinder Sandwiches shown in our visual blueprint, you need high-quality components. Each ingredient serves a specific purpose in building the flavor profile and structural integrity of the sandwich.
The Sub Rolls: Look for high-quality hoagie or sub rolls that are soft on the inside but have a sturdy exterior. You want rolls that can withstand the weight of the meat and the heat of the oven without becoming a “bread-brick.”
Genoa Salami: 1/2 lb (225g) of thin-sliced genoa salami. Folding the salami instead of laying it flat creates air pockets that trap melted cheese and heat, making the sandwich feel much more substantial.
Deli Ham: 1/2 lb (225g) of thin-sliced deli ham. This provides a mild, slightly sweet base that balances the spicier pepperoni and salty salami.
Pepperoni Slices: 4 oz (115g) of large deli-style pepperoni. When baked, pepperoni releases flavorful oils that act as a natural sauce for the bread.
Mozzarella Cheese: 8 oz (225g) of low-moisture, part-skim mozzarella. This variety melts beautifully and develops those characteristic toasted brown spots without releasing too much water and making the bread soggy.
The Spice Blend: 1 tsp (2g) dried oregano and 1/2 tsp (1g) crushed red pepper flakes. These are the “Italian” soul of the sandwich, providing earthiness and a gentle hum of heat.
Unsalted Butter: 2 tbsp (30ml) of melted butter mixed with a pinch of garlic powder. Brushing the crust of the Baked Italian Grinder Sandwiches before toasting ensures that signature golden-brown finish.
How to Construct the Ultimate Baked Italian Grinder Sandwiches
Success in this recipe is all about the “build.” Follow these steps to ensure your sandwich looks exactly like our professional blueprint and tastes even better.
Step 1: Prep the Bread and Base
Preheat your oven to 400°F (200°C). Slice your sub rolls lengthwise, but try not to cut all the way through; a “hinge” helps keep the ingredients contained. Place the rolls on a parchment-lined baking sheet.
Brush the interior and the top crust of the rolls with a little melted butter. This creates a fat barrier that prevents the meat juices from making the bread soft, while also encouraging a golden-brown bread crust during the bake.
Step 2: The Art of Layering the Meats
Start with a thick foundation of the folded genoa salami. By folding the rounds into quarters or halves, you create height and texture. Next, layer the thin-sliced deli ham, followed by the pepperoni slices.
If you love these Italian flavors, you should also try my Italian Grinder Tortellini Salad which uses the same flavor profile in a cold pasta format—it’s the perfect side dish for a summer BBQ.
Step 3: Achieving the Perfect Melt
Cover the meat layers with a generous, thick layer of shredded or sliced mozzarella cheese. Ensure the cheese reaches the edges of the meat. Sprinkle the dried oregano flakes and crushed red pepper directly onto the cheese.
This allows the herbs to bloom in the fat of the cheese as it melts, intensifying the flavor. For a truly professional look, ensure some cheese “droops” over the sides of the meat to create those crispy cheese edges on the parchment paper.
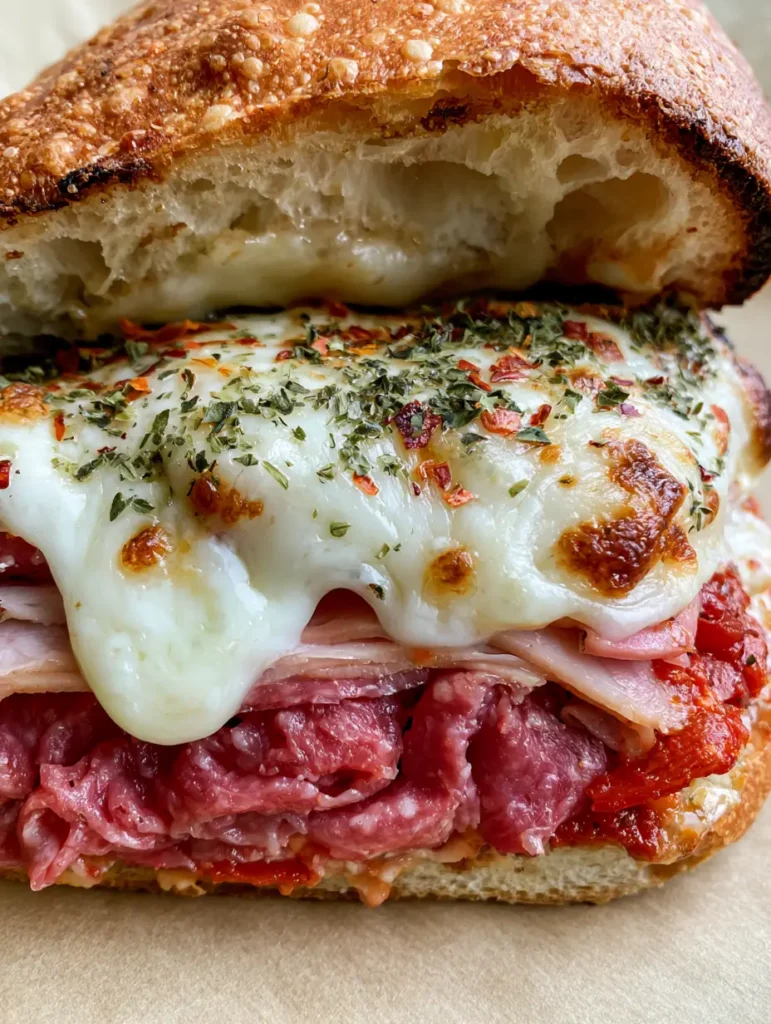
Step 4: The High-Heat Bake
Slide the baking sheet into the oven. Bake for 8–12 minutes. You are looking for specific visual cues: the bread should have visible air bubbles on the crust, and the mozzarella should be melted and bubbly with distinct toasted brown spots.
If the cheese isn’t browning to your liking, you can turn on the broiler for the last 60 seconds. Keep a very close eye on it, as the golden-brown bread crust can turn to a char very quickly under direct flame!
Pro Tips for Sandwich Success
- Don’t Skimp on the Butter: Brushing the outside of the roll is what gives it that handheld “smartphone photo” aesthetic. It creates a beautiful sheen and a satisfying crunch.
- Room Temperature Meats: If you have time, let your deli meats sit out for 10 minutes before assembling. This ensures the center of the sandwich gets hot without over-toasting the bread.
- The Parchment Paper Trick: Always bake on neutral parchment paper. It catches any rogue pepperoni oil or melted cheese, making cleanup easy and preventing the bottom of the bread from sticking.
- Add a “Grinder Salad” Topper: While these Baked Italian Grinder Sandwiches are perfect as-is, many people love to top them with a mixture of shredded iceberg lettuce, red onion, and red wine vinegar dressing after they come out of the oven.
Storage, Reheating, and Make-Ahead Instructions
Storage: These sandwiches are best enjoyed fresh out of the oven. However, if you have leftovers, wrap them tightly in aluminum foil and store them in the refrigerator for up to 2 days.
Reheating: To maintain the golden-brown bread crust, avoid the microwave. Instead, place the sandwich back in a 350°F (175°C) oven or an air fryer for 5–7 minutes until the cheese is bubbly again and the bread is crisp.
Freezing: I do not recommend freezing the assembled sandwich, as the bread texture will degrade. You can, however, freeze the meats and cheese pre-portioned to make assembly faster on a busy night.
What to Serve with Baked Italian Grinder Sandwiches
A heavy, savory sandwich needs a bright or crunchy side to balance the palate. If you want a classic pairing, this Classic Broccoli Salad provides a great creamy crunch that offsets the spicy pepperoni.
For those who want to stick with the Italian theme, my Italian Sausage Bow Tie Pasta is a great warm side, or you could keep it simple with a bag of kettle-cooked sea salt chips and a cold pickle spear.
If you’re hosting a larger crowd and need more protein options, consider serving these alongside Oven-Baked Chicken Legs for a diverse spread that everyone will love.
Common Questions About This Recipe
You can assemble the meat and cheese on the bread up to 4 hours in advance. Keep them wrapped in the fridge, then brush the crust with butter right before baking.
Absolutely! While mozzarella provides the best ‘bubbly’ look, adding provolone or fontina can add a sharper flavor and excellent meltability.
The secret is brushing the interior of the roll with butter or a light layer of oil before adding the meats. This creates a barrier. Additionally, using low-moisture mozzarella prevents excess water from soaking into the crumb.
A sturdy hoagie roll or an Italian sub roll works best. Avoid very soft ‘hot dog’ style buns, as they will collapse under the weight of the folded meats.
Folding the meat creates air pockets and ‘nooks and crannies’ for the cheese to melt into, giving the sandwich more volume and a better mouthfeel than flat layers.
The Ultimate Baked Italian Grinder Recipe Card
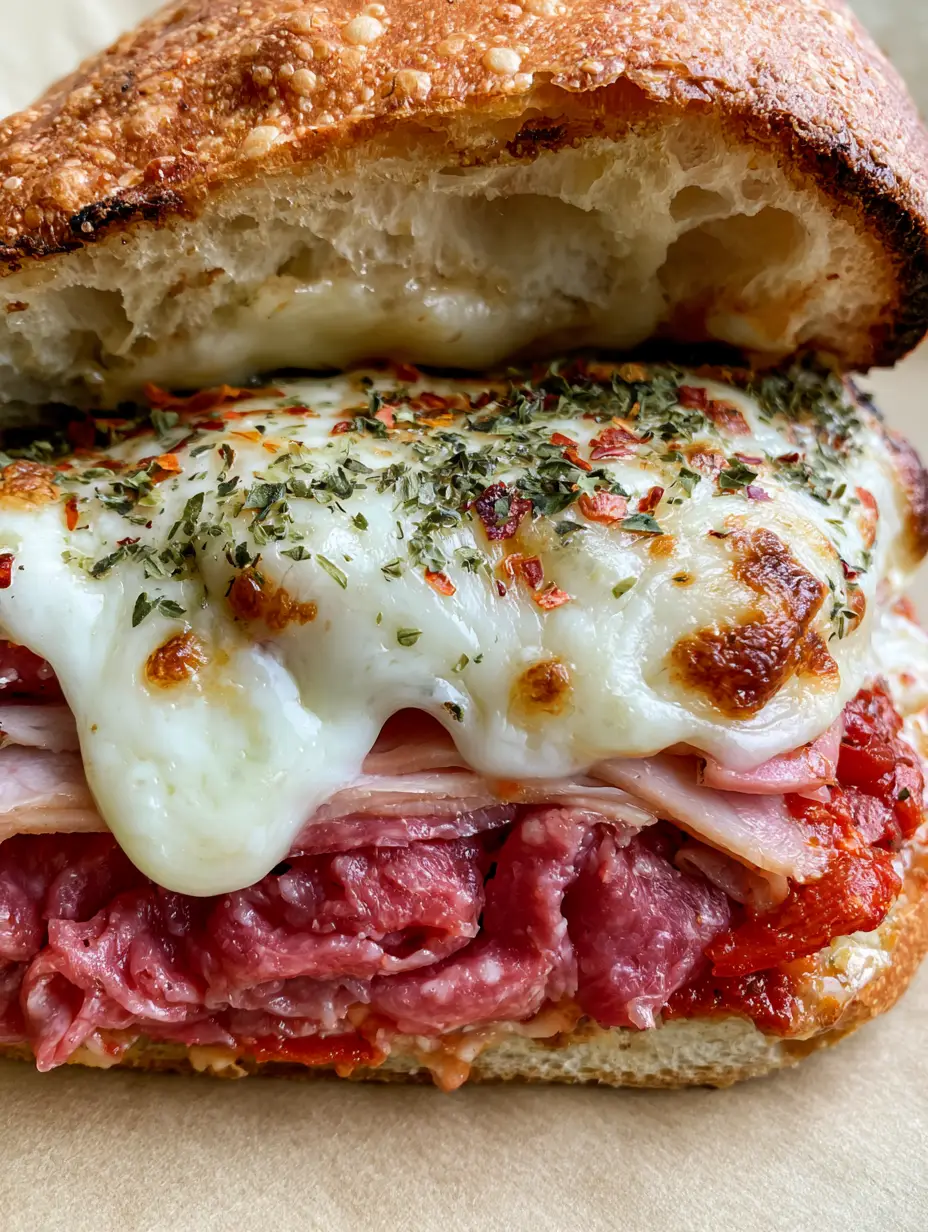
Baked Italian Grinder Sandwiches with Bubbly Mozzarella
Ingredients
Equipment
Method
- Preheat your oven to 400°F (200°C) and line a baking sheet with neutral parchment paper.
- Slice the sub rolls lengthwise (keeping a hinge) and brush the crust and interior with melted butter for a golden-brown finish.
- Layer the folded genoa salami, thin-sliced ham, and pepperoni onto the bottom half of the rolls.
- Top the meats with a thick layer of mozzarella cheese. Generously sprinkle with dried oregano and crushed red pepper flakes.
- Bake for 8-12 minutes until the cheese is melted and bubbly with toasted brown spots and the bread is crusty.
Notes
Use low-moisture mozzarella to prevent the bread from becoming soggy.
Join the RecipeHarvest Community!
We hope you love these Baked Italian Grinder Sandwiches as much as we do! There is nothing quite like that first bite of toasted bread and melted cheese. If you make this recipe, please save it to your Pinterest boards so you never lose it!
Be sure to follow RecipeHarvest for more comforting, viral-worthy recipes. Did your sandwich turn out with that perfect golden-brown crust? Share a photo in the comments below and leave us a 5-star rating—it helps our community grow and keeps the kitchen cooking!