If you are looking for the most nostalgic, melt-in-your-mouth treat, this Banana Pudding Fudge is exactly what your kitchen needs. Combining the classic flavors of a Southern potluck staple with the rich, dense texture of gourmet white chocolate fudge, this recipe is a visual and culinary masterpiece. Every bite delivers a pale yellow burst of banana flavor, balanced by the crunch of golden vanilla wafers.
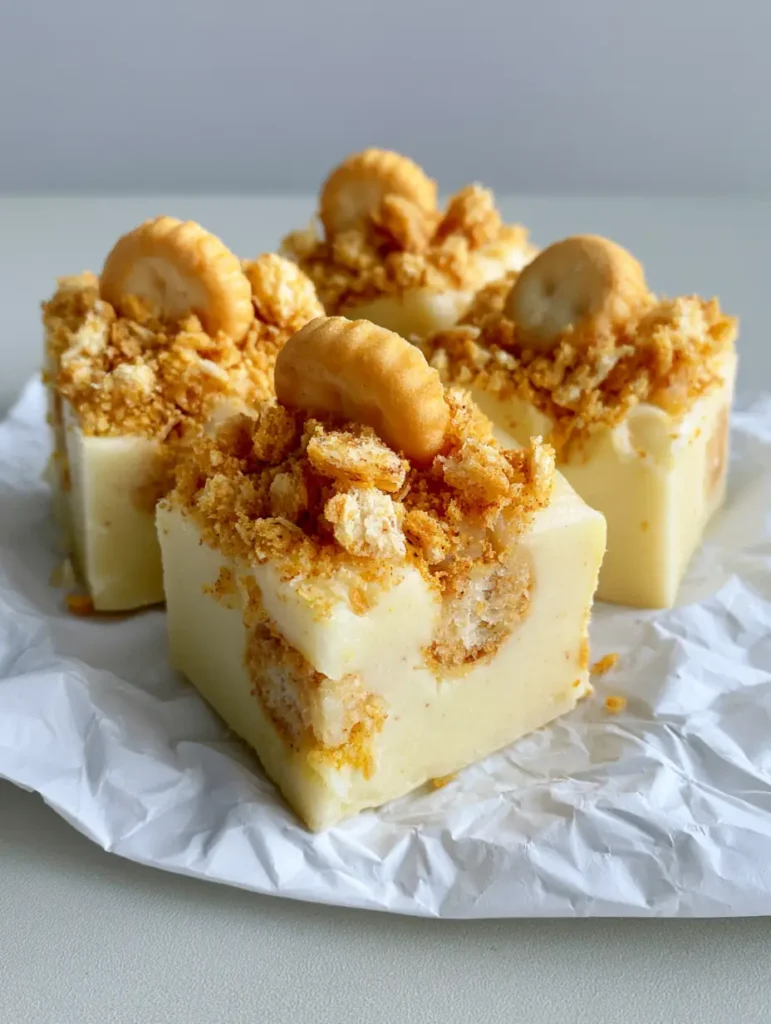
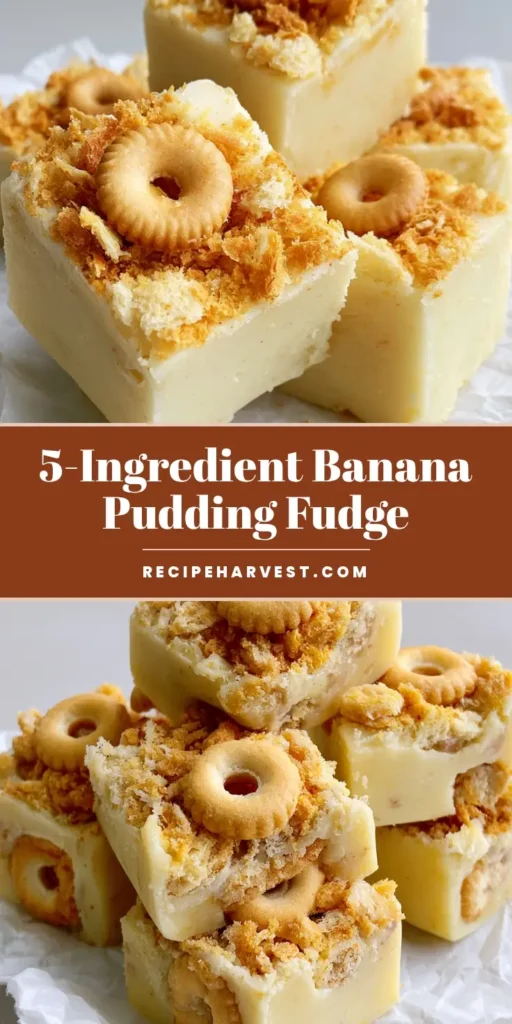
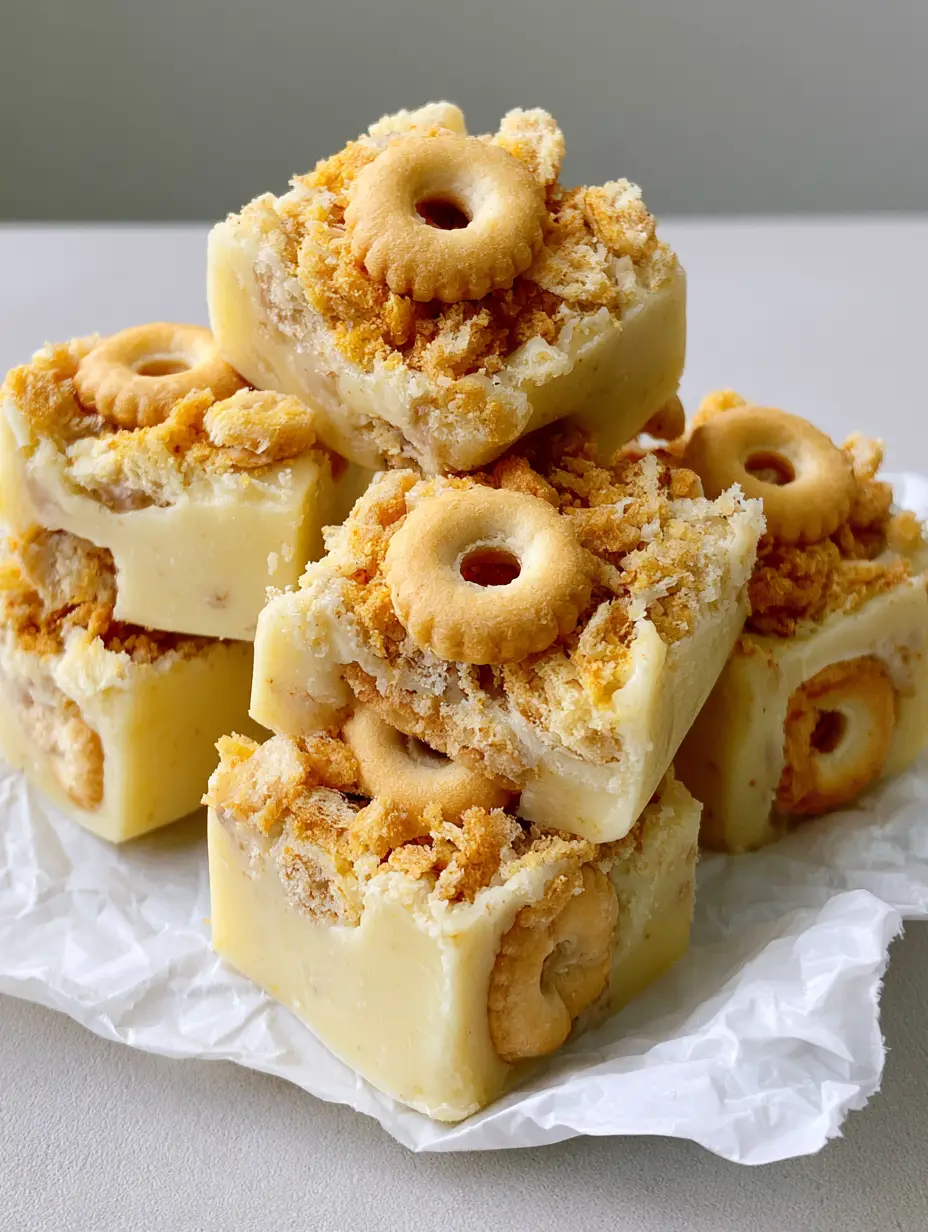
This Banana Pudding Fudge is specifically designed to stand out on your dessert platters. With its smooth matte texture and iconic wafer topping, it looks just as good as it tastes. Whether you are a fan of no-bake banana pudding or you just love a creative twist on candy making, this recipe will quickly become a household favorite.
Why You Will Obsess Over This Banana Pudding Fudge
- The Iconic Pastel Hue: We achieve a gorgeous light pastel yellow color without using harsh artificial dyes, relying on the natural tint of the pudding mix.
- Perfect Texture Contrast: The fudge itself has a smooth, matte finish that contrasts beautifully with the crispy crushed vanilla wafer pieces.
- Handheld Convenience: Unlike a messy pudding bowl, these small square blocks are the perfect grab-and-go treat for parties or gifts.
- Pinterest-Ready Aesthetic: The addition of a whole mini vanilla wafer pressed into the center of each square makes these look like they came from a high-end boutique bakery.
The Science of the Silky Matte Finish
Creating the perfect Banana Pudding Fudge requires understanding the balance of fats and sugars. Traditional fudge can sometimes turn out overly glossy or greasy. To achieve the smooth matte finish dictated by our visual blueprint, we utilize a combination of high-quality white chocolate and sweetened condensed milk.
The addition of the instant pudding mix acts as a stabilizer. It helps the fudge set firmly while maintaining that characteristic pale yellow glow. If you love this flavor profile, you might also enjoy experimenting with a banana pudding frosting for your next cake project.
Essential Ingredients for Gourmet Banana Fudge
To ensure your Banana Pudding Fudge turns out perfectly, you need to use the right components. Do not substitute the instant pudding for cook-and-serve, as the chemical reaction required for setting won’t occur correctly.
- White Chocolate Chips: 3 cups (510g). Use a high-quality brand with cocoa butter for the best melt and smooth matte texture.
- Sweetened Condensed Milk: 1 can (14 oz / 397g). This provides the creamy base and the necessary sugar for the fudge to set.
- Instant Banana Cream Pudding Mix: 1 box (3.4 oz / 96g). This provides the light pastel yellow color and the core flavor.
- Unsalted Butter: 2 tbsp (28g). Adds a professional silkiness to the Banana Pudding Fudge.
- Vanilla Extract: 1 tsp (5ml). Enhances the natural banana notes.
- Vanilla Wafers: 1 cup (approx. 100g) crushed, plus 24-36 whole mini vanilla wafers for the topping.
- Salt: A pinch (approx. 1g). To balance the intense sweetness of the white chocolate.
Step-by-Step Instructions to Achieve Fudge Perfection
1. Preparing Your Canvas
Start by lining an 8×8 inch (20x20cm) square baking pan with crinkled white parchment paper. Leave an overhang on the sides so you can easily lift the Banana Pudding Fudge out once it has set. This is crucial for getting those clean, sharp edges on your squares.
2. The Melting Process
In a medium heavy-bottomed saucepan over low heat, combine the white chocolate chips, sweetened condensed milk, and butter. Stir constantly with a silicone spatula. Visual Cue: You are looking for a completely liquid, uniform mixture with no remaining chocolate lumps. Do not rush this step; high heat will cause the white chocolate to seize and lose its smooth matte finish.
3. Integrating the Banana Flavor
Once the base is smooth, whisk in the instant banana pudding mix and vanilla extract. The mixture will begin to thicken almost immediately. Sensory Cue: The color will shift to a beautiful, light pastel yellow, and the aroma will remind you of a classic banana pudding fluff salad.
4. Adding the Crunch
Fold in half of the crushed vanilla wafer pieces. These hidden bits provide a surprising texture inside the soft fudge. Quickly pour the mixture into your prepared pan and smooth the top with an offset spatula until it is level.
5. The Signature Visual Topping
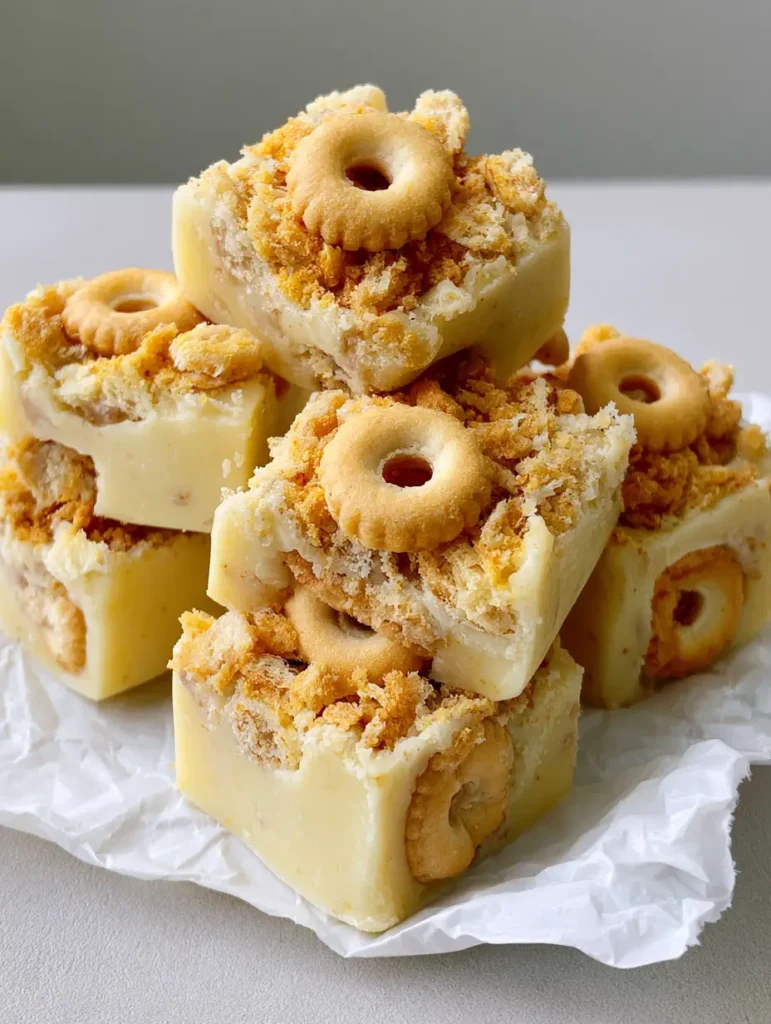
This is the most important step for the Visual Recipe Blueprint. While the fudge is still slightly tacky, sprinkle a generous layer of crushed golden vanilla wafer crumbs across the entire surface. Finally, take your whole mini vanilla wafers and press one gently into the center of where each square will be cut.
6. The Setting Phase
Place the pan in the refrigerator for at least 4 hours, or ideally overnight. The fudge needs this time to develop its smooth matte finish and firm structure. If you try to cut it too early, the Banana Pudding Fudge will be too soft to hold its shape.
Expert Tips for Success
- Use Sharp Tools: For clean cuts, use a large chef’s knife dipped in hot water and wiped dry between every single slice. This prevents the fudge from sticking and tearing.
- Avoid Moisture: Ensure your mixing bowl and spatula are completely dry. Even a drop of water can cause white chocolate to seize, ruining the smooth matte texture.
- Crumb Consistency: For the topping, use a mix of fine dust and larger crushed vanilla wafer pieces to create visual depth and a professional “bakery style” look.
- Pudding Choice: Ensure you are using “Instant” pudding. If you are looking for other pudding-based inspirations, check out our coconut rice pudding for a different flavor profile.
Storage and Freezing Guidelines
Banana Pudding Fudge stores exceptionally well, making it a great make-ahead dessert. Keep it in an airtight container in the refrigerator for up to 2 weeks. The cool temperature helps maintain the pale yellow color and keeps the wafers from becoming too soft.
For long-term storage, you can freeze the fudge for up to 3 months. Wrap individual small square blocks in plastic wrap and then place them in a freezer-safe bag. Thaw in the fridge before serving to preserve the texture.
What to Serve With This Treat
Because this Banana Pudding Fudge is quite sweet and rich, it pairs perfectly with salty or savory counterpoints. If you are hosting a party, consider serving it alongside a fresh Italian grinder tortellini salad to balance the palate. The creamy banana flavor also acts as a great finish after a meal of spicy wings or a hearty casserole.
Frequently Asked Questions
It is not recommended to use fresh mashed bananas as the moisture content will prevent the fudge from achieving its signature smooth matte texture and cause it to spoil quickly.
The light pastel yellow color comes naturally from the instant banana pudding mix. Avoid adding extra food coloring to keep the authentic matte look.
This usually happens if you use ‘Cook and Serve’ pudding mix instead of ‘Instant’, or if the white chocolate was not melted properly with the condensed milk. Ensure you chill the fudge for at least 4 hours.
The wafers will stay crunchy for the first 24-48 hours. To keep them crisp longer, store the fudge in an airtight container in the refrigerator and add the whole wafers just before the fudge fully sets.
The Official Banana Pudding Fudge Recipe Card
Ready to create this viral Pinterest sensation? Follow the exact measurements below to achieve that pale yellow, smooth matte finish that has everyone talking.
Banana Pudding Fudge: The Ultimate Creamy No-Bake Dessert
Ingredients
Equipment
Method
- Line an 8x8 inch pan with parchment paper, leaving an overhang for easy removal.
- In a saucepan over low heat, melt white chocolate chips, condensed milk, and butter until smooth.
- Whisk in the dry pudding mix and vanilla extract until the mixture turns pale yellow and thickens.
- Fold in half the crushed wafers and spread the mixture evenly into the prepared pan.
- Sprinkle remaining crumbs and press whole mini wafers into the top. Chill for 4 hours until set with a matte finish.
Notes
Ensure pudding mix is 'Instant' and not 'Cook and Serve'.
Share Your Banana Pudding Fudge Creations!
We want to see your results! Did you manage to get that perfect smooth matte finish? Snap a photo of your small square blocks and share it on Pinterest, tagging @RecipeHarvest. Don’t forget to Save this recipe to your Dessert Board so you never lose it! If you loved these flavors, please leave a 5-star rating and a comment below telling us what you think.