If you are searching for the most decadent, crowd-pleasing snack, these Chocolate Peanut Butter Rice Krispie Treats are the answer to your cravings. Combining the nostalgic crunch of golden crispy rice cereal with the salty-sweet richness of creamy peanut butter and a thick, solid layer of melted milk chocolate, this recipe elevates a childhood classic into a gourmet masterpiece. Whether you are prepping for a bake sale or just need a sweet fix, these treats offer a professional finish with a handheld, smartphone-ready aesthetic that looks as good as it tastes.
Why These Are the Best Chocolate Peanut Butter Rice Krispie Treats You Will Ever Make
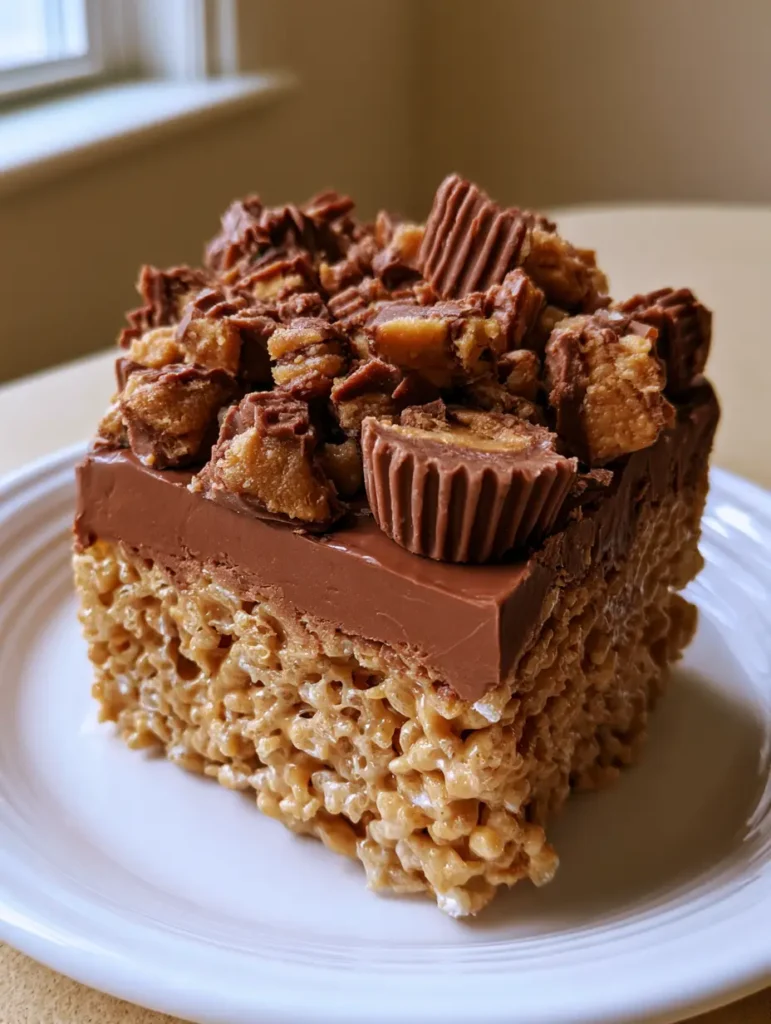
- Triple Layer Texture: A chewy, marshmallow-bound peanut butter base topped with a snap-worthy chocolate layer and textured Reese’s chunks.
- Perfectly Balanced: The saltiness of the peanut butter cuts through the sugar of the marshmallows for a sophisticated flavor profile.
- Visual Masterpiece: The heavily garnished top with roughly chopped peanut butter cups showcases distinct ridged chocolate edges and creamy centers.
- No-Bake Ease: Achieve a bakery-quality dessert in under 30 minutes of active time without ever turning on the oven.
The Anatomy of a Perfect Rice Cereal Treat: Key Ingredients
To achieve the specific texture seen in our Chocolate Peanut Butter Rice Krispie Treats, every ingredient serves a culinary purpose. Do not skip the quality of your chocolate, as it defines the final “snap” of the top layer.
Crisped Rice Cereal: 6 cups (160g). This provides the essential “golden crispy” foundation that maintains its structural integrity under the weight of the toppings.
Mini Marshmallows: 10 oz (283g). Use fresh, soft marshmallows for the ultimate chew. They act as the “glue” that keeps the cereal light and airy rather than dense and hard.
Creamy Peanut Butter: 1 cup (250g). We recommend a standard creamy brand (like Jif or Skippy) rather than natural oil-separated varieties to ensure the base sets firmly.
Salted Butter: 4 tbsp (56g). The fat in the butter prevents the marshmallows from becoming too sticky and adds a necessary savory note. If you’re looking for more buttery snacks, you might enjoy our cajun garlic butter sauce (coming soon) recipes for dinner inspiration.
Milk Chocolate Chips: 2 cups (340g). A solid milk chocolate layer provides that signature sweetness that complements the peanut butter base perfectly.
Peanut Butter Cups: 1 cup (approx. 150g), roughly chopped. Use Reese’s or a similar brand to get those iconic ridged chocolate edges that make the top garnish pop.
Vanilla Extract and Salt: 1 tsp (5ml) and 1/4 tsp (1.5g). These invisible ingredients amplify the chocolate and peanut butter flavors, ensuring the treat isn’t just sweet, but complex.
The Step-by-Step Method for Professional Results
1. Preparing the Golden Peanut Butter Foundation
In a large heavy-bottomed pot over low heat, melt your butter. Once melted, add the marshmallows and stir constantly. The secret to a chewy treat is low heat. If you rush this process with high heat, the sugars in the marshmallows will crystallize, leading to a rock-hard treat once cooled.
When the marshmallows are 90% melted, stir in the creamy peanut butter. This ensures the peanut butter is fully incorporated into the “glue” without scorching. Remove from heat and immediately fold in your rice cereal. Work quickly to coat every grain of cereal in the golden, marshmallowy mixture.
2. Pressing Without Packing
Transfer the mixture into a greased 9×9 inch (23x23cm) pan. CRITICAL TIP: Do not press down hard. Use a piece of parchment paper or a greased spatula to gently pat the mixture into the corners. If you pack it too tightly, the treat will be difficult to bite. We want a thick, chewy blend of golden crispy rice cereal, not a dense brick.
3. Creating the Solid Melted Milk Chocolate Layer
While the base sets for a few minutes, melt your milk chocolate chips in 30-second intervals in the microwave, stirring in between. Once the chocolate is smooth and glossy, pour it over the cereal base. Use an offset spatula to spread it into an even, edge-to-edge solid layer. This creates the “bridge” between the crunchy base and the decadent toppings.
4. The Signature Garnish: Chopped Peanut Butter Cups
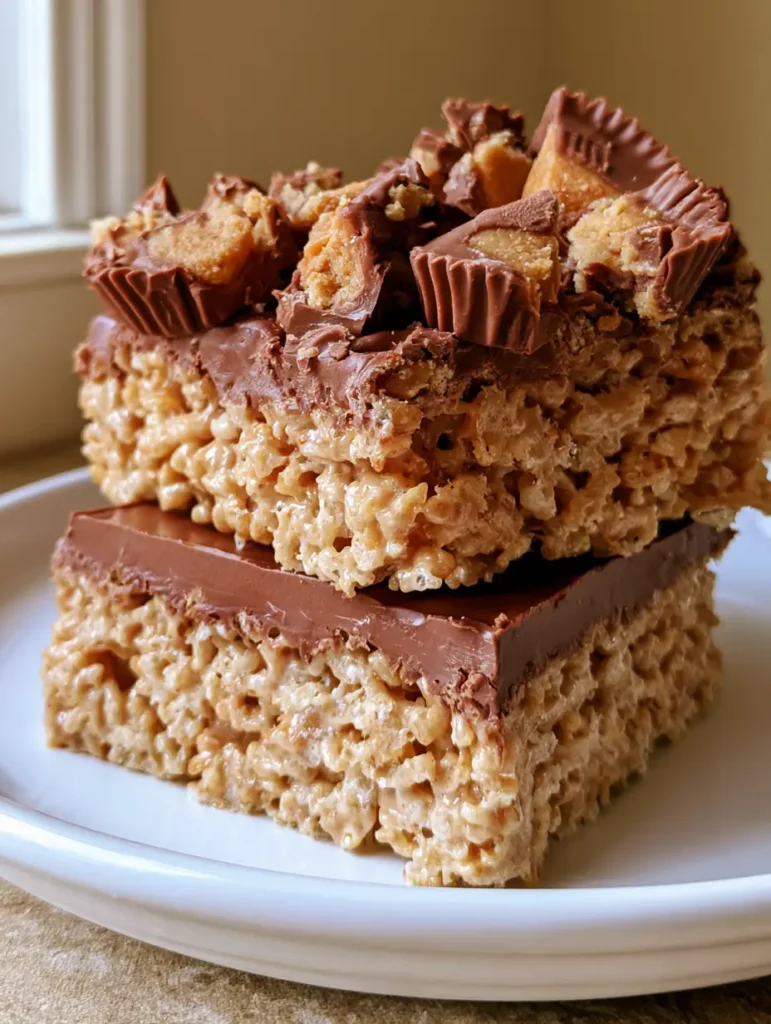
Wait about 2-3 minutes for the chocolate to slightly cool but still remain wet. Take your roughly chopped peanut butter cups and scatter them heavily over the top. Visual Cue: Ensure you can see the creamy peanut butter centers and the ridged edges of the cups. Lightly press them into the milk chocolate so they adhere as the layer solidifies. This is what gives these Chocolate Peanut Butter Rice Krispie Treats their viral Pinterest appeal.
Expert Tips for Pinterest-Worthy Success
- Use Fresh Marshmallows: If your bag has been open for more than a week, buy a new one. Old marshmallows result in a dry, crumbly treat.
- The “Handheld” Photo Secret: To get that smartphone photo look from the prompt, use a sharp knife to cut perfectly square edges. Clean the knife with hot water between every single cut for those smooth, professional layers.
- Ambient Temperature: Let the treats set at room temperature for at least 2 hours. If you refrigerate them to speed up the process, the chocolate may bloom (turn white) and the base may become too hard to eat comfortably.
- Salt is Key: A tiny pinch of flakey sea salt over the milk chocolate layer can elevate these from “kids’ snack” to “adult dessert.”
- Variation Idea: If you love this flavor profile, try our oat flour peanut butter cookies for a gluten-free alternative that hits the same peanut butter notes.
How to Store and Preserve Freshness
To keep your Chocolate Peanut Butter Rice Krispie Treats at peak texture, store them in an airtight container at room temperature for up to 5 days. Layer them with parchment paper to prevent the chocolate tops from sticking to the bottom of the treats above them.
Can you freeze them? Yes! Wrap individual squares tightly in plastic wrap and place them in a freezer bag. They will stay fresh for up to 3 months. Thaw at room temperature for 20 minutes before serving. Never microwave them, as the marshmallow structure will collapse and the chocolate will melt into a mess.
What to Serve with These Decadent Treats
Since these are quite rich, they pair beautifully with a cold glass of milk or a strong cup of black coffee. If you’re serving them at a dessert buffet, they look stunning next to a bowl of fresh berries or a lighter dessert like our coconut rice pudding recipe. For a full “comfort food” day, consider a hearty meal like baked macaroni and cheese before ending with these squares.
Frequently Asked Questions
Yes, but milk chocolate provides the classic ‘Reese’s’ flavor profile that pairs best with the salty peanut butter base. If using dark, ensure it’s at least 60% cocoa for the best snap.
It is not recommended. Natural peanut butter often lacks the stabilizers needed to help the marshmallow base set properly, which can result in a greasy or crumbly treat.
Melt your chocolate chips in short intervals in the microwave and stir until completely glossy. Spread it immediately over the base using an offset spatula before it starts to cool.
It’s best to let them set at room temperature for 2-3 hours. Refrigeration can make the cereal too hard and may cause the chocolate layer to lose its glossy finish.
This usually happens if the marshmallows were melted over high heat or if you packed the mixture too tightly into the pan. Always use low heat and a gentle touch when pressing them down.
The Official Chocolate Peanut Butter Rice Krispie Treats Recipe

Chocolate Peanut Butter Rice Krispie Treats: The Ultimate No-Bake Layered Dessert
Ingredients
Equipment
Method
- In a large pot over low heat, melt the butter. Add marshmallows and stir constantly until nearly melted.
- Stir in the creamy peanut butter and vanilla until smooth. Remove from heat immediately.
- Gently fold in the crisped rice cereal until evenly coated with the marshmallow mixture.
- Transfer to a prepared 9x9 pan. Gently pat down without packing too tightly to maintain a chewy texture.
- Melt milk chocolate chips in the microwave in 30-second bursts. Spread in an even layer over the cereal base.
- Top with roughly chopped peanut butter cups, ensuring ridged edges are visible. Let set at room temperature.
Notes
Clean your knife with hot water between cuts for professional squares.
Save This Recipe for Later!
Did you love these Chocolate Peanut Butter Rice Krispie Treats? Make sure to save this recipe to your “Dessert” or “No-Bake Treats” board on Pinterest so you never lose it! Follow RecipeHarvest for more viral-worthy kitchen inspiration. If you make these, snap a handheld photo of your stack and share it in the comments below or tag us—we love seeing those ridged peanut butter cup edges! Don’t forget to leave a 5-star rating if this is your new favorite way to eat rice cereal.