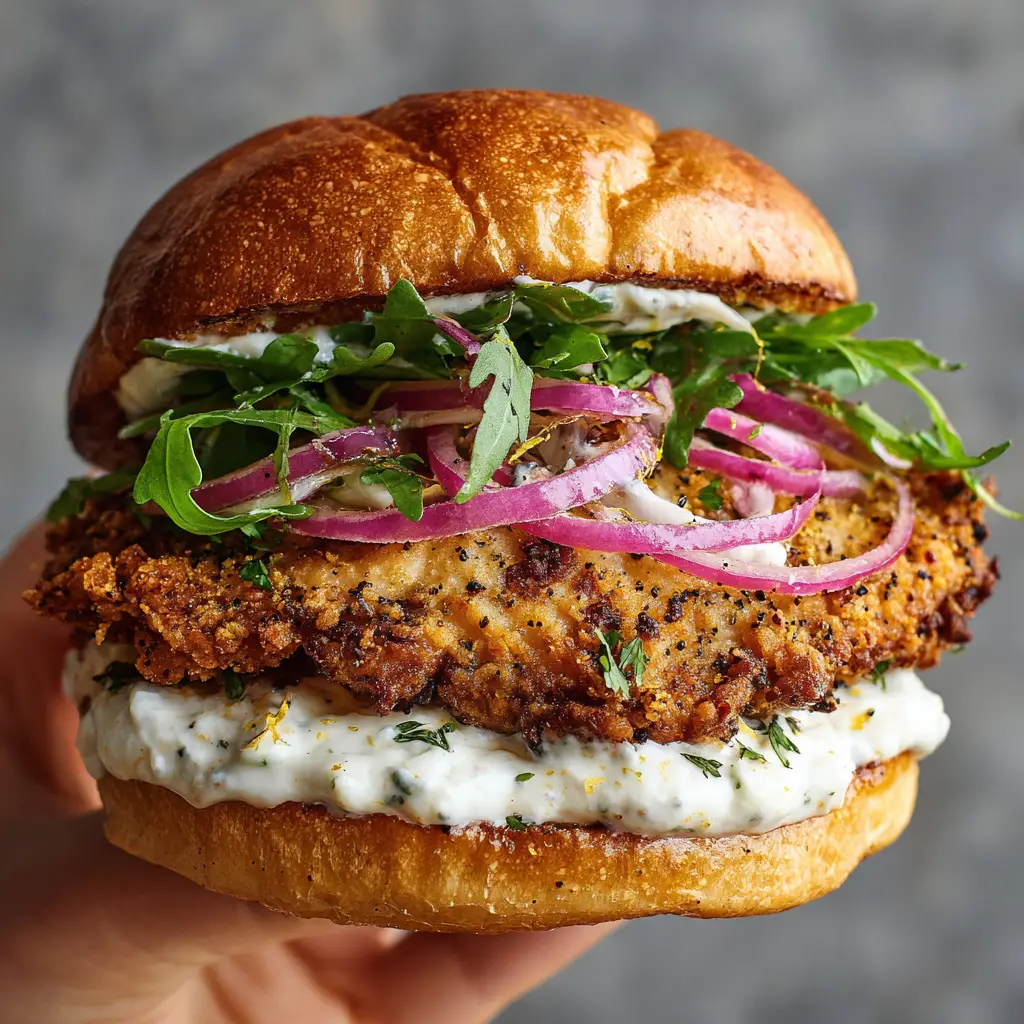
The Lemon Pepper Chicken Sandwich is not just a meal; it is a multisensory experience that combines the sharp, citrusy brightness of fresh zest with the deep, earthy heat of cracked black pepper. This specific recipe is designed to recreate the gourmet, handheld perfection you see in high-end bistro photography, featuring a craggy, ultra-crunchy crust and a vibrant assembly of fresh greens.
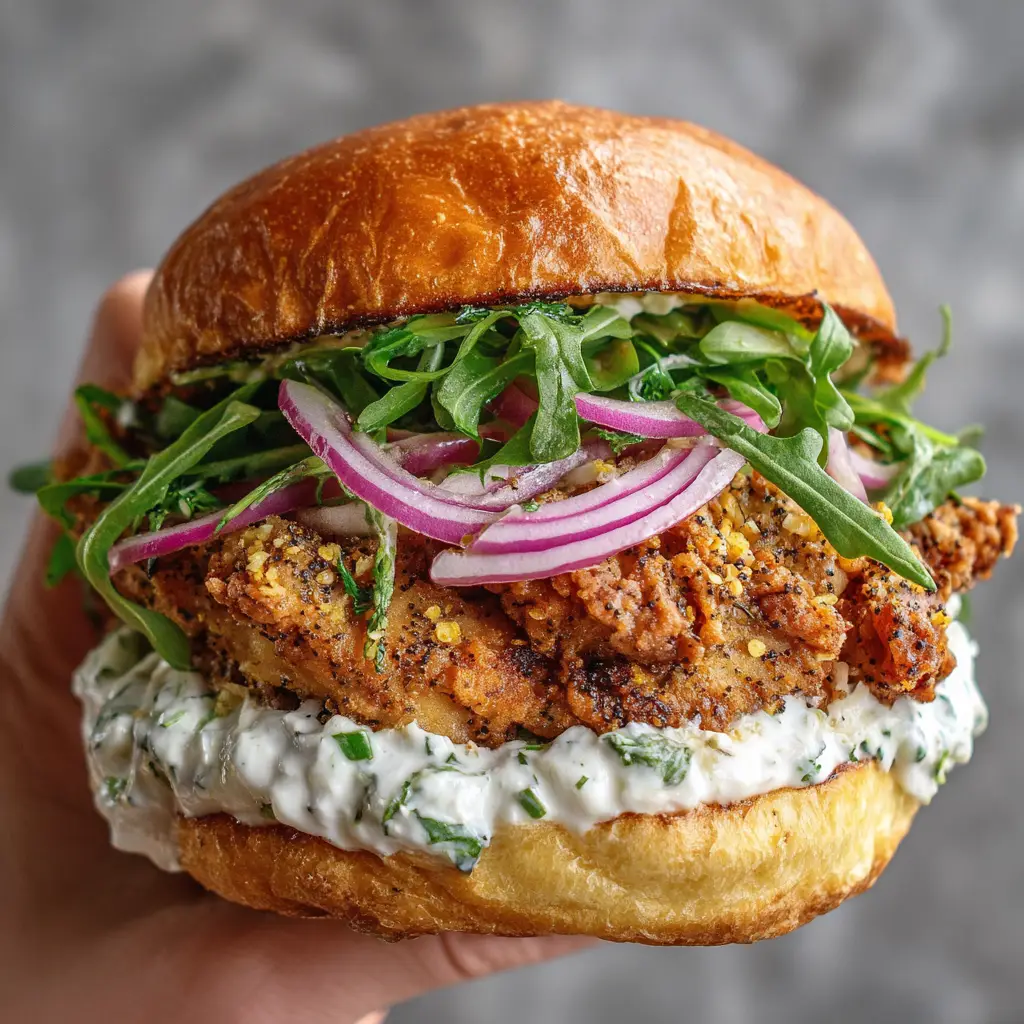
To achieve the visual and textural standard of a true Lemon Pepper Chicken Sandwich, we focus on the “craggy” texture of the golden-brown chicken breast. This is achieved through a specific double-dredging technique that creates those coveted nooks and crannies for the creamy herb aioli to cling to.
Why This Crispy Citrus Masterpiece Works
- Unmatched Texture: The combination of flour and cornstarch creates a shatteringly crisp exterior that stays crunchy even under a thick layer of herb aioli.
- Zesty Flavor Profile: Unlike generic seasonings, we use fresh lemon zest and hand-cracked peppercorns to provide a bright, floral aroma that store-bought powders lack.
- Gourmet Presentation: The contrast between the golden-brown chicken, the deep green baby arugula, and the vibrant purple of thinly sliced red onions makes this sandwich a visual showstopper.
- Balanced Ratios: The buttery, toasted brioche bun provides the perfect soft foundation to support the thick, juicy fried chicken breast.
Anatomy of the Perfect Lemon Pepper Chicken Sandwich
Chicken Breasts: Use two 6oz (170g) boneless, skinless breasts, pounded to an even thickness. This ensures even cooking and a perfect fit for your brioche buns.
Brioche Buns: These high-fat, egg-based buns are essential for their sweetness and ability to toast to a perfect golden sheen. They provide a soft contrast to the “craggy” chicken.
Lemon Zest & Cracked Black Pepper: Freshness is non-negotiable here. You will need 1 tbsp (6g) of freshly grated lemon zest and 2 tsp (10g) of coarsely cracked black pepper to achieve the visible seasoning shown in the blueprint.
Creamy Herb Aioli: A base of 1/2 cup (120ml) high-quality mayonnaise combined with fresh parsley, chives, and lemon juice. This “creamy white” sauce acts as the cooling element for the pepper’s heat.
Baby Arugula: 1 cup (30g) of fresh arugula provides a peppery bite that complements the lemon. It adds a vibrant green layer that elevates the sandwich from standard to gourmet.
Red Onion: Half of a small red onion, sliced into paper-thin rings. These add a sharp, crisp texture and a pop of color that cuts through the richness of the fried chicken.
Foundational Coating: You will need 1 cup (125g) all-purpose flour, 1/4 cup (32g) cornstarch, and 1 cup (240ml) buttermilk. The buttermilk tenderizes the meat while the cornstarch ensures a professional-grade crunch.
Essential Tools for Professional Frying
To achieve the “golden-brown” result described in our visual blueprint, a heavy-bottomed cast iron skillet or a Dutch oven is required. These vessels maintain consistent oil temperature, which is the secret to preventing a greasy sandwich.
You will also need a digital meat thermometer to ensure the chicken reaches an internal temperature of 165°F (74°C). Finally, a fine-mesh zester and a pepper grinder set to a coarse “cracked” setting are vital for the flavor profile.
How to Achieve the Signature Craggy Crunch
Step 1: The Buttermilk Brine and Dredge Prep
In a large bowl, whisk together 1 cup (240ml) buttermilk, 1 tsp (5g) salt, and 1 tsp (5g) cracked black pepper. Submerge your chicken breasts in this mixture for at least 30 minutes to ensure every bite is juicy and seasoned to the bone.
In a separate shallow dish, combine the flour, cornstarch, another teaspoon of cracked pepper, and a pinch of salt. This dry mixture is what creates the craggy texture when it hits the wet buttermilk coating.
Step 2: Frying for Golden Perfection
Heat 2 inches (5cm) of neutral oil in your skillet to 350°F (175°C). Lift the chicken from the buttermilk, let the excess drip off, and press it firmly into the flour mixture, ensuring every crevice is covered.
Carefully lower the chicken into the hot oil. Fry for 5-7 minutes per side until the exterior is a deep, craggy golden-brown and the internal temperature hits 165°F (74°C). Remove to a wire rack and immediately sprinkle with fresh lemon zest and extra cracked pepper while the oil is still wet on the surface.
Step 3: Whipping the Herb Aioli and Toasting Buns
While the chicken rests, whisk together the mayonnaise, chopped herbs, and a squeeze of lemon juice until creamy. This provides the “thick layer of creamy white herb aioli” essential for the sandwich’s moisture.
Split your brioche buns and spread a thin layer of butter on the cut sides. Toast them in a dry pan over medium heat until the edges are golden and the center is soft and warm.
Step 4: The Final Gourmet Assembly
Spread a generous tablespoon of the herb aioli on the bottom bun. Place the hot, lemon-pepper seasoned chicken breast on top, followed by another thick layer of aioli on the chicken itself.
Layer a handful of fresh baby arugula and several thinly sliced red onions over the aioli. Close the sandwich with the top brioche bun and serve immediately to maintain the “handheld smartphone photo” aesthetic.
Secret Pro-Tips for Sandwich Success
- The Flour Clump Trick: Drizzle 2 tablespoons of the buttermilk brine into your flour mixture and rub it in with your fingers before dredging. This creates the small “clumps” that turn into those extra-crunchy crags during frying.
- Zest Timing: Always add the lemon zest immediately after frying. The residual heat from the chicken will “bloom” the oils in the zest, making the Lemon Pepper Chicken Sandwich incredibly aromatic.
- Onion Mellowing: If you find red onions too sharp, soak the slices in ice water for 10 minutes before drying and adding them to the sandwich.
- Don’t Crowd the Pan: Fry only one or two breasts at a time. Overcrowding drops the oil temperature, leading to a soggy crust rather than a crispy one.
Keeping Your Chicken Crispy
Fried chicken is best enjoyed immediately, but if you have leftovers, store the chicken separately from the buns and greens. Keep the chicken in an airtight container in the refrigerator for up to 3 days.
To reheat and maintain that “golden-brown” crunch, avoid the microwave. Instead, place the chicken in an air fryer or oven at 375°F (190°C) for 5-8 minutes until heated through and sizzled back to life.
The Best Sides for Your Lemon Pepper Chicken Sandwich
This sandwich is a star on its own, but it pairs beautifully with light, acidic sides that balance the fried elements. For a healthy alternative to fries, try these Roasted Sweet Potato Rounds which offer a natural sweetness that complements the lemon.
If you want to keep the meal crisp and fresh, an Authentic Greek Salad with its feta and olives provides a salty tang that works perfectly. For a classic deli-style experience, serve your sandwich alongside these crunchy Refrigerator Pickles.
Common Questions About This Gourmet Creation
Yes, though the texture will be slightly different. Spray the breaded chicken generously with oil and air fry at 400°F (200°C) for 12-15 minutes, flipping halfway through.
The secret is to add 1-2 tablespoons of buttermilk brine into your dry flour mixture. Rub it in with your fingers to create small clumps; these clumps stick to the chicken and fry into the ‘craggy’ texture.
While you can use other buns, brioche is recommended because its high egg and butter content creates a soft, rich contrast to the crispy, salty fried chicken.
Use a mandoline slicer on the thinnest setting. Paper-thin red onions provide a delicate crunch and aesthetic appeal without overpowering the other flavors.
Frying can dull the brightness of lemon zest. Adding it immediately after frying allows the residual heat to release the essential oils for maximum aroma without burning the zest.
The Complete Lemon Pepper Chicken Sandwich Recipe
The Ultimate Lemon Pepper Chicken Sandwich with Creamy Herb Aioli
Ingredients
Equipment
Method
- Whisk buttermilk, salt, and pepper in a bowl. Submerge chicken for 30 minutes. In another dish, mix flour, cornstarch, and more pepper.
- Heat oil to 350°F (175°C). Dredge chicken in flour, pressing to create crags. Fry for 5-7 minutes per side until golden-brown. Sprinkle with lemon zest and pepper immediately after removing from oil.
- Whisk mayo, lemon juice, and chopped herbs in a small bowl until creamy.
- Toast buttered buns. Layer aioli, fried chicken, more aioli, arugula, and red onions. Serve warm.
Notes
Tip 2: Always zest the lemon directly over the hot chicken to release aromatic oils.

Join the Recipe Harvest Community
The Lemon Pepper Chicken Sandwich is a testament to how simple ingredients, when handled with professional technique, can create a world-class meal. Whether you are cooking for a weekend lunch or an impressive dinner, this recipe delivers on every promise of flavor and texture.
If you loved this recipe, please leave a comment below and tell us how your “craggy” crust turned out! Don’t forget to follow us and share your creations on Pinterest to help other home cooks find their next favorite meal.