There is nothing quite like the audible “snap” of a perfectly chilled, homemade pickle. These Refrigerator Pickles represent the pinnacle of home preservation without the intimidation of water-bath canning. By combining fresh, vibrant cucumber rounds with a punchy garlic and dill infusion, you create a condiment that elevates everything from a simple lunch to a gourmet barbecue spread.
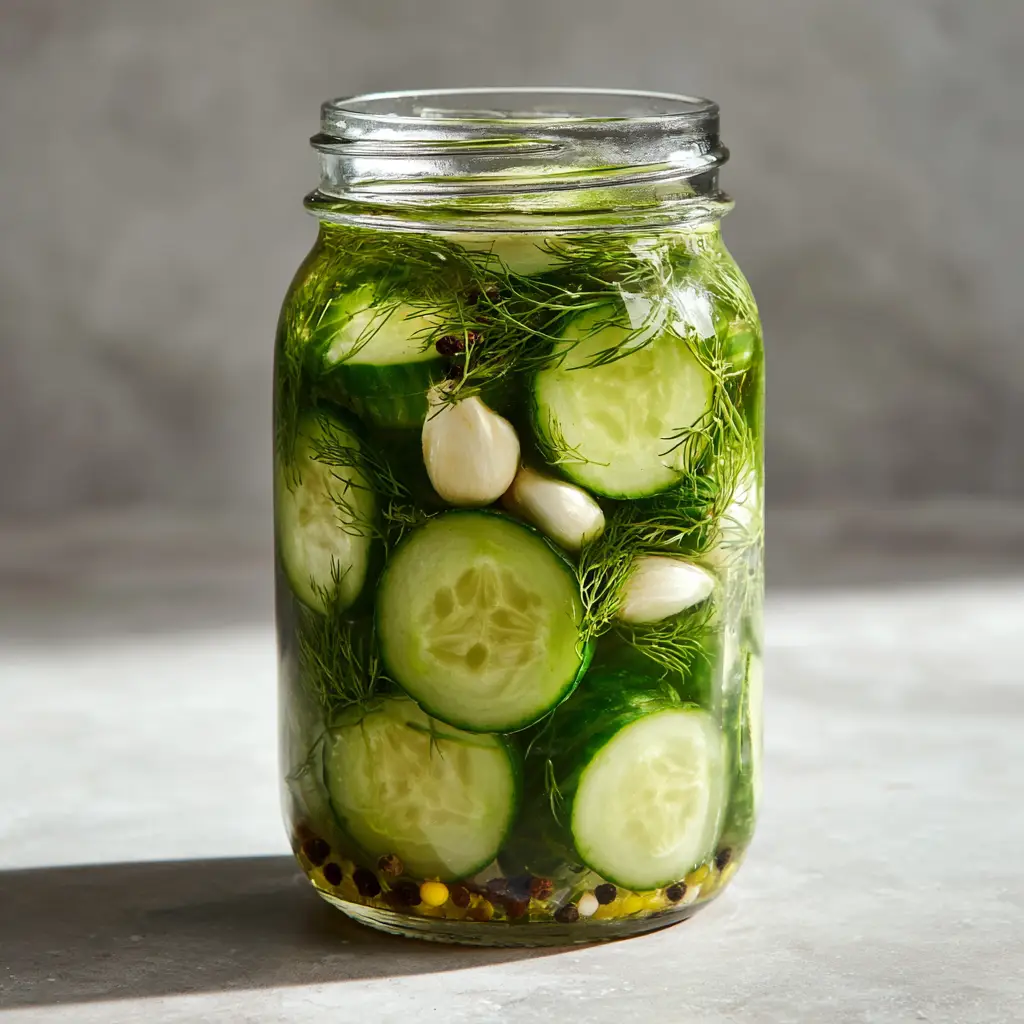
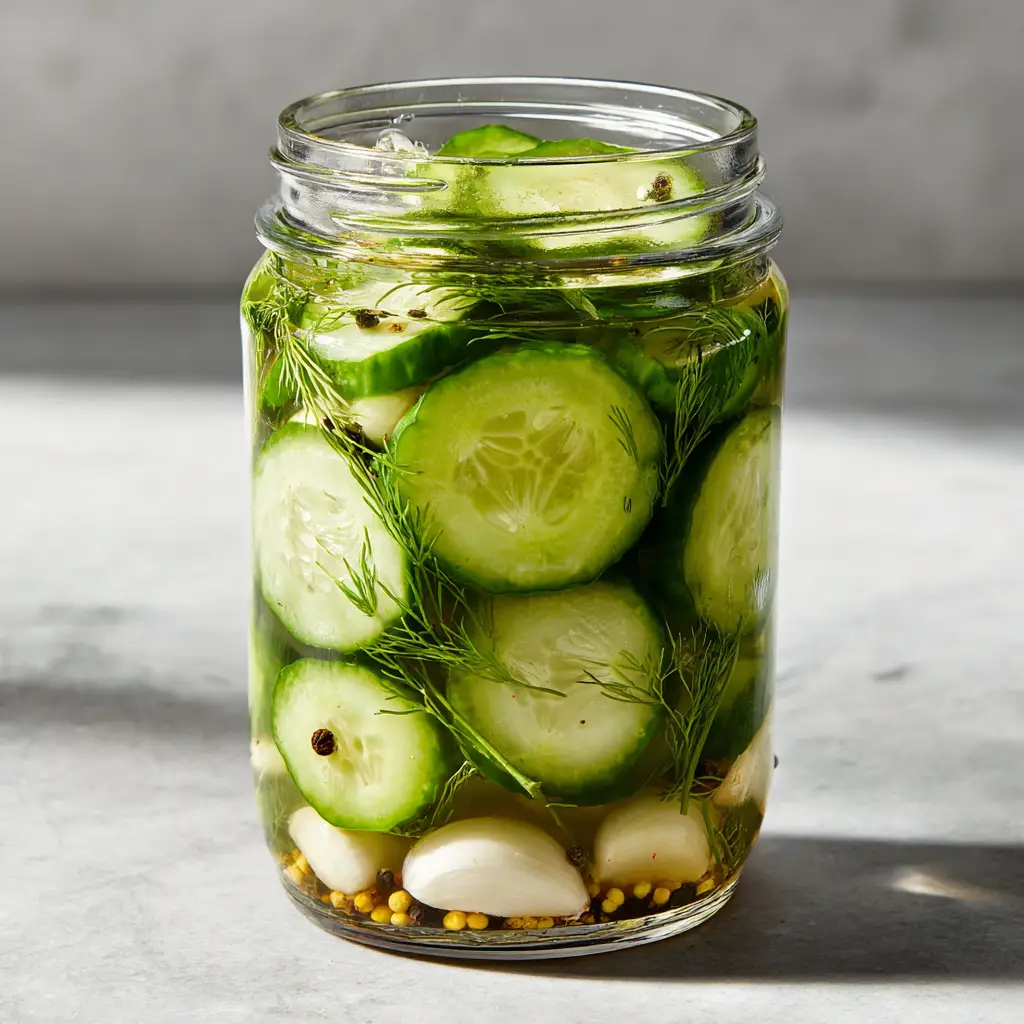
Our Refrigerator Pickles are designed to look as stunning as they taste. Imagine a wide-mouth mason jar, sunlight catching the translucent brine, where layers of emerald-green cucumber rounds are nestled against whole, pearlescent garlic cloves and feathery sprigs of fresh dill. This recipe isn’t just about flavor; it is about the visual artistry of a well-packed jar resting on your kitchen counter.
Whether you are a seasoned gardener with an overabundance of produce or a home cook looking to skip the store-bought sodium, this method ensures a crunch that lasts for weeks. Unlike processed pickles, these maintain their “living” green color and firm texture, providing a refreshing bite that pairs beautifully with a zesty chicken sandwich or a summer spread.
Why These Garlic and Dill Rounds Are the Ultimate Kitchen Staple
- Unbeatable Crunch Factor: By avoiding the high heat of traditional canning, the cell structure of the cucumbers remains intact, resulting in a superior, snappy texture.
- Visual Forensic Perfection: The clear, translucent brine allows the beauty of the whole garlic cloves, mustard seeds, and peppercorns to shine through, making these gift-worthy.
- Balanced Flavor Profile: A precise ratio of acid to salt, enhanced by the aromatic depth of fresh dill and pungent garlic.
- Zero Special Equipment: No pressure cookers or massive boiling pots required—just a clean jar and your refrigerator.
The Anatomy of a Perfect Brine: Ingredients and Science
To achieve the crystal-clear results seen in our visual guide, the quality of your ingredients is paramount. Each component plays a scientific role in the preservation and flavor development of your Refrigerator Pickles.
Cucumbers (Kirby or Persian): 1.5 lbs (680g). Look for firm, bumpy-skinned cucumbers. Their low water content and thick skins are essential for maintaining that signature “snap” once submerged in the acidic brine.
Fresh Dill Sprigs: 4-6 large sprigs. Freshness is key here; the oils in the dill fronds provide the classic aromatic backbone that dried dill simply cannot replicate.
Whole Garlic Cloves: 4-5 cloves (25g). We keep these whole and peeled to ensure a slow, mellow infusion of garlic flavor without making the brine cloudy or overly sharp.
Black Peppercorns: 1 tsp (5g). These provide a subtle, earthy heat that lingers on the back of the palate, cutting through the vinegar’s acidity.
Yellow Mustard Seeds: 1 tsp (5g). These little seeds add a hint of floral pungency and look beautiful as they settle at the bottom of the glass jar.
White Vinegar: 1.5 cups (355ml). With 5% acidity, distilled white vinegar provides the sharpest, cleanest flavor profile, ensuring your Refrigerator Pickles stay bright and clear.
Filtered Water: 1.5 cups (355ml). Using filtered water prevents minerals from reacting with the vinegar, which can sometimes cause a bluish tint in the garlic or a cloudy appearance.
Kosher Salt: 2 tbsp (30g). Essential for seasoning and preservation. Avoid table salt, as the anti-caking agents will turn your brine murky.
Granulated Sugar: 1 tbsp (12g). A foundational “invisible” ingredient. This small amount doesn’t make the pickles sweet; it simply rounds out the harsh edges of the vinegar.
Essential Tools for Precision Pickling
To recreate the handheld smartphone photo aesthetic of our master recipe, you only need a few basic kitchen tools. Precision in slicing and packing is what separates an average pickle from an elite one.
You will need a 32oz (1L) wide-mouth mason jar, which allows for easy packing of the cucumber rounds. A sharp chef’s knife or a mandoline is necessary to achieve uniform slices. A small non-reactive saucepan (stainless steel or glass) is required to simmer the brine without metallic leaching.
How to Craft Your Refrigerator Pickles: Step-by-Step Instructions
Phase 1: Preparing the Aromatics and Jar
Start by thoroughly washing your wide-mouth mason jar with hot, soapy water. While we aren’t heat-processing for long-term shelf storage, a clean environment is vital for a long refrigerator life. Peel your garlic cloves, keeping them whole and pristine.
Drop the yellow mustard seeds and half of the black peppercorns into the bottom of the jar. This ensures that as you consume the pickles, the spices remain distributed throughout the liquid. If you’re looking for a refreshing side, these aromatics also complement an authentic Greek salad.
Phase 2: Slicing and Packing for Maximum Density
Slice your cucumbers into rounds approximately 1/4 inch (6mm) thick. Uniformity is key for even brining. Begin packing the cucumbers into the jar, wedging the whole garlic cloves and fresh dill sprigs between the slices as you go.
Pack the jar tightly—press down firmly but gently. You want the cucumbers to be snug so they don’t float once the liquid is added. The goal is to see those garlic cloves and peppercorns peeking through the glass, exactly like our visual blueprint.
Phase 3: Simmering the Translucent Brine
In your saucepan, combine the white vinegar, filtered water, kosher salt, and sugar. Place over medium heat and stir until the salt and sugar are completely dissolved. You do not need a rolling boil; a gentle simmer is sufficient to marry the flavors.
Once dissolved, remove the brine from the heat. Let it cool for about 5-10 minutes. Pouring boiling-hot brine directly onto the cucumbers can slightly cook them, compromising the crunch. We want a “warm” pour to help the flavors penetrate without losing the raw texture.
Phase 4: The Final Submersion
Slowly pour the warm brine over the packed cucumbers until they are completely submerged. Leave about 1/2 inch (1cm) of headspace at the top of the jar. Tap the jar gently on a wooden cutting board to release any trapped air bubbles.
If you have leftover peppercorns, scatter them on top before sealing the lid tightly. Allow the jar to sit on the counter until it reaches room temperature, then move it to the refrigerator. For the best flavor, wait at least 24 hours before your first taste.
Expert Tips for the Crispiest Refrigerator Pickles
- The Ice Bath Trick: Before slicing, soak your whole cucumbers in an ice-water bath for 30 minutes. This firms up the pectin in the skin, guaranteeing a louder “crunch.”
- Trim the Ends: Always slice off the blossom end of the cucumber (the end opposite the stem). It contains enzymes that can soften the pickle prematurely.
- Garlic Color Changes: Don’t panic if your garlic turns a slight blue or green! This is a natural reaction between the garlic’s sulfur and the vinegar’s acidity. It is perfectly safe to eat.
- Salt Quality: Always use Pickling Salt or Kosher Salt. Table salt contains iodine which can darken the pickles and turn the brine muddy.
Storage and Life Cycle of Your Homemade Batch
These Refrigerator Pickles must be kept in the fridge at all times. Because they are not heat-processed, they are a perishable product. They will stay perfectly crisp and safe to eat for up to 4 weeks. After that, they may begin to lose their firmness, though they are often still delicious in a creamy pasta salad.
Never “double-dip” into the jar with your fingers. Always use a clean fork to remove pickles to prevent the introduction of bacteria, which will extend the life of your brine.
What to Serve With Your Fresh Garlic Pickles
These pickles are the perfect acidic counterpoint to rich, fatty foods. Try them alongside a juicy turkey burger or as a crisp topping for a classic chicken club sandwich.
For a healthy summer spread, serve them on a platter with grilled chicken bites and fresh vegetables. The vinegar punch cleanses the palate between bites, making every morsel taste as fresh as the first.
Frequently Asked Questions
Yes, but it will change the color and flavor. Apple cider vinegar makes the brine slightly amber-colored and adds a fruity note. White vinegar is preferred for the cleanest, most traditional flavor and visual clarity.
You only need to heat the brine enough to dissolve the salt and sugar. Pouring a boiling hot brine can cook the cucumbers; let it cool slightly (to about 140°F/60°C) before pouring to maintain the best texture.
They are at their peak crunch for the first 2 weeks. They remain safe and delicious to eat for up to 4 weeks, but they will slowly soften over time as the brine breaks down the cucumber’s cell walls.
Kirby (pickling) cucumbers are best due to their thick skin and firm flesh. Persian cucumbers are a great second choice. Avoid large ‘Slicing’ or English cucumbers as they have too much water and will become mushy.
This is a harmless chemical reaction between the sulfur in the garlic and the acid in the vinegar. It often happens if the garlic is slightly immature or if there are minerals in your water. It is safe to eat!
The Master Recipe for Crisp Refrigerator Pickles
Refrigerator Pickles: The Ultimate Easy Garlic and Dill Crisp Recipe
Ingredients
Equipment
Method
- Wash a 32oz mason jar with hot soapy water. Place mustard seeds and half the peppercorns in the bottom.
- Pack sliced cucumbers into the jar, wedging garlic cloves and dill sprigs between the layers for visual appeal.
- In a saucepan, combine vinegar, water, salt, and sugar. Heat over medium until fully dissolved, then let cool for 5 minutes.
- Pour the warm brine over the cucumbers until fully submerged, leaving 1/2 inch of headspace. Scatter remaining peppercorns on top.
- Tighten the lid and allow to reach room temperature on the counter before refrigerating.
- Chill for at least 24 hours before eating for the best flavor infusion.
Notes
Cut off the blossom end of the cucumbers to prevent softening.
Join the Harvest: Share Your Results!
Making your own Refrigerator Pickles is a rewarding step toward a more artisanal kitchen. The vibrant colors and sharp flavors are a testament to the beauty of simple, fresh ingredients. If you enjoyed this recipe, please leave a comment below and tell us how your “crunch” turned out!
Don’t forget to save this recipe to your boards on Pinterest so you can find it every time your garden overflows with cucumbers. Happy pickling!