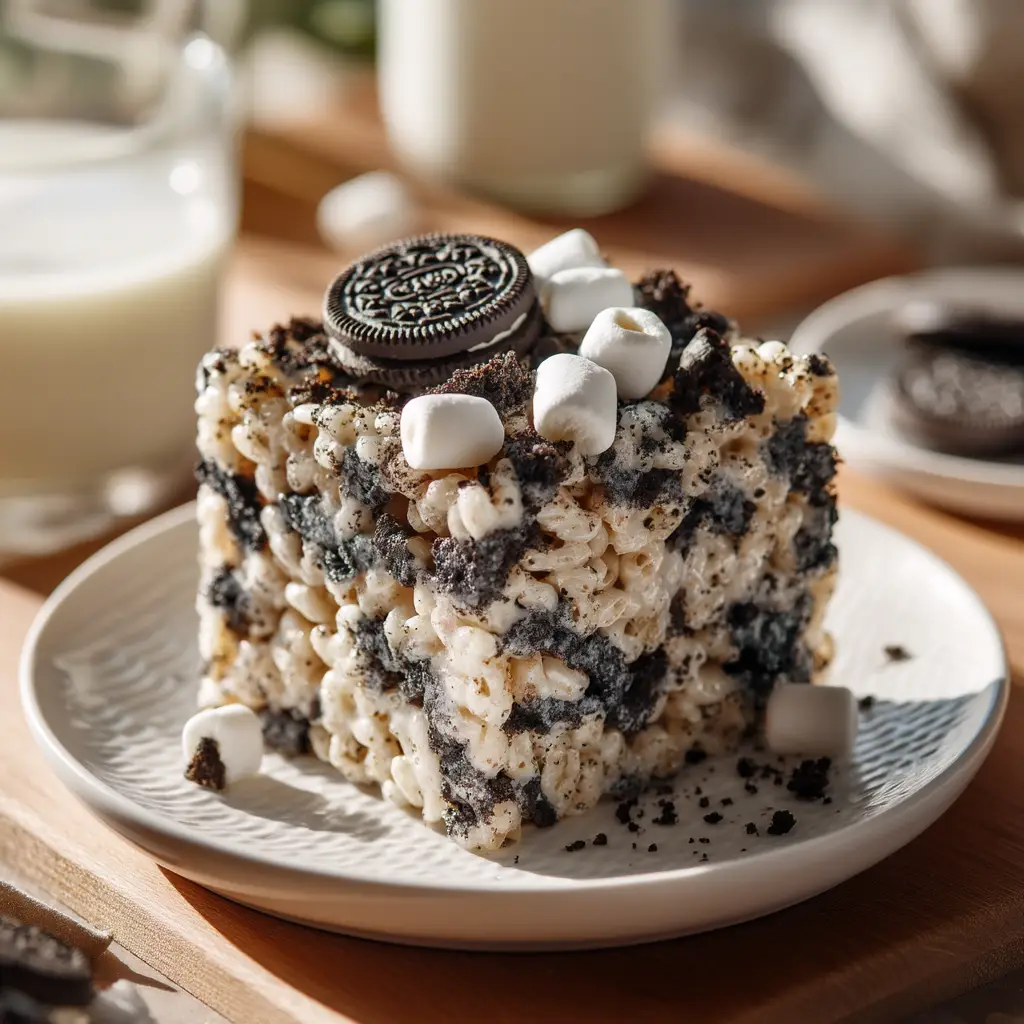
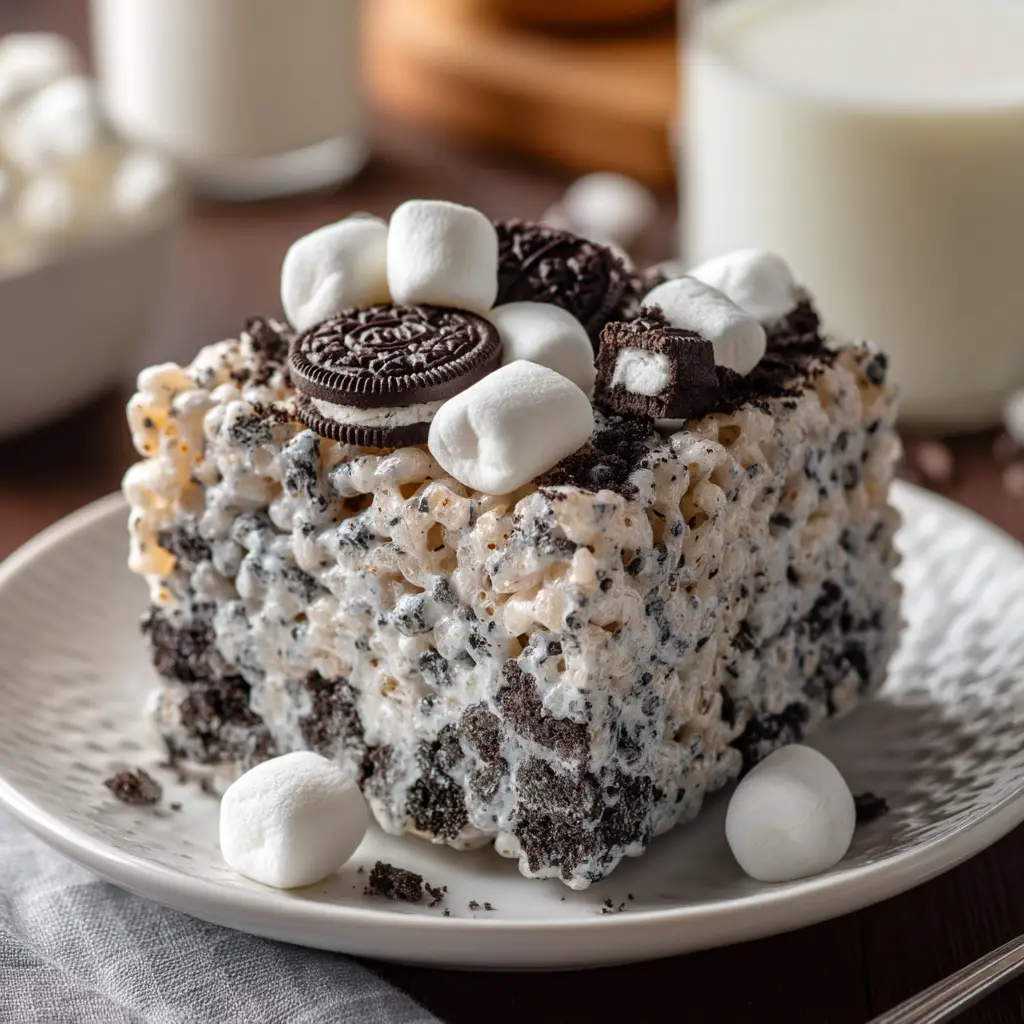
When the nostalgic crunch of a classic marshmallow bar meets the iconic, cocoa-rich bite of a sandwich cookie, magic happens. These Oreo Rice Krispie Treats aren’t just your standard childhood snack; they are a decadent, thick-cut dessert that looks as professional as it tastes. Imagine a perfectly square bar, white-gold with melted marshmallows, marbled with deep black cocoa crumbles, and topped with whimsical mini cookies.
The visual appeal of these Oreo Rice Krispie Treats is second to none, specifically designed to be the centerpiece of any dessert table. We have focused on a “double marshmallow” technique to ensure every bite is punctuated by soft, gooey clouds of marshmallow nestled against the crispy cereal. If you have been looking for a no-bake treat that pairs perfectly with a cold glass of milk, you have found the definitive recipe.
Why These Oreo Rice Krispie Treats Are the Ultimate Crowd-Pleaser
- Textural Masterclass: We combine the “snap” of puffed rice cereal with the “crunch” of chopped Oreos and the “chew” of whole mini marshmallows.
- Perfectly Square Proportions: These treats are intentionally thick, providing a satisfying weight and professional bakery-style aesthetic.
- Double Oreo Impact: By mixing crumbles into the base and garnishing with mini cookies, we maximize that signature cookies-and-cream flavor profile.
- Visual Contrast: The stark contrast between the white marshmallow binding and the black cookie shards creates a striking, photogenic result.
The Culinary Architecture of the Perfect Cookie-Infused Marshmallow Bar
Unsalted Butter (1/2 cup or 115g): We use high-quality butter to provide a rich, fat-based foundation that keeps the treats soft for days. Browning the butter slightly can add a nutty depth that elevates the sugar profile.
Mini Marshmallows (10 oz or 283g + 2 cups or 100g extra): The primary bag is melted into the “glue,” while the extra 2 cups (100g) are folded in at the end to remain whole and visible. This creates that “gourmet” texture seen in the visual blueprint.
Pure Vanilla Extract (1 tsp or 5ml): This is a foundational “invisible” ingredient that bridges the gap between the sweet cereal and the deep cocoa of the cookies.
Fine Sea Salt (1/4 tsp or 1.5g): Do not skip this; salt is scientifically required to cut through the intense sweetness and enhance the chocolate notes.
Crispy Rice Cereal (6 cups or 160g): This provides the structural skeleton of our Oreo Rice Krispie Treats, offering a light, airy crunch that doesn’t overwhelm the palate.
Oreo Cookies (20 standard cookies, chopped): These are roughly chopped into various sizes so you get both fine black “dust” that colors the marshmallow and larger “chunks” for bite.
Mini Oreo Cookies & Extra Marshmallows (for garnish): These are pressed into the top while the mixture is still warm, ensuring the final product matches our visual recipe blueprint perfectly.
Essential Kitchen Tools for Professional-Grade No-Bake Squares
To achieve the “perfectly square” result described in our visual prompt, a 9×9 inch (23x23cm) square baking pan is essential. Using a smaller pan than the traditional 9×13 ensures the bars are thick and substantial rather than thin and flimsy.
You will also need a large, heavy-bottomed pot or Dutch oven to prevent the marshmallows from scorching. A silicone spatula is your best friend here, as the mixture is incredibly sticky. Finally, high-quality parchment paper is mandatory for a clean release and sharp, professional edges.
Master the Melt: A Step-by-Step Guide to Gourmet Oreo Rice Krispie Treats
Preparing Your Canvas for a Non-Stick Experience
Start by lining your 9×9 inch (23x23cm) pan with parchment paper, leaving an overhang on two sides to act as a “sling.” Lightly grease the parchment with a small amount of butter or non-stick spray. This step is the secret to getting those perfectly straight, clean edges when you finally slice your Oreo Rice Krispie Treats.
Emulsifying the Golden Marshmallow Base
In your large pot, melt the butter over medium-low heat. Listen for the subtle sizzling to stop—this indicates the water has evaporated and the butter is ready. Add the 10 oz (283g) of mini marshmallows and the salt. Stir constantly until the marshmallows have completely melted into a smooth, glossy cloud. Remove from heat immediately and stir in the vanilla extract; you should smell a sweet, floral aroma instantly.
Incorporating the Crunch and the “Whole Marshmallow” Secret
Working quickly, fold in the rice cereal and the chopped Oreo cookies until they are evenly coated in the marshmallow silk. Now, add the remaining 2 cups (100g) of whole mini marshmallows. Fold them in gently just until distributed—you do not want them to melt completely. This creates the beautiful white-on-white texture seen in professional food photography.
The Visual Finishing Touch: Garnishing and Setting
Transfer the mixture to your prepared pan. Using a piece of buttered parchment or a greased spatula, press the mixture down very gently. If you press too hard, the treats will become dense and tough. While the top is still tacky, artfully press your mini Oreos and extra mini marshmallows into the surface. Let the bars set at room temperature for at least 1 hour before lifting the parchment sling and slicing into 9 or 16 perfect squares.
Expert Secrets for That Signature Soft and Chewy Texture
- Low and Slow Heat: High heat makes marshmallows turn “glassy” and hard once they cool. Always melt on low to keep the proteins soft and stretchy.
- The “Freshness” Rule: Check the expiration date on your marshmallows. Stale marshmallows do not melt correctly and will result in a grainy texture.
- The Buttered Knife Trick: When slicing your Oreo Rice Krispie Treats, lightly coat a sharp chef’s knife in butter or oil. This allows for a clean, vertical cut without pulling at the marshmallow fibers.
- Don’t Refrigerate: Cold temperatures cause the sugars to crystallize and the treats to become rock-hard. Keep them at room temperature for the best “pull.”
Maintaining Peak Freshness: Storage and Longevity
To maintain that “just-made” softness, store your Oreo Rice Krispie Treats in an airtight container at room temperature. They will remain peak-delicious for up to 4 days. If you are stacking them, place a layer of parchment paper between the bars to prevent the mini Oreo garnishes from sticking to the bottoms of the bars above them.
While we don’t recommend freezing them (as the cereal can lose its crispness), you can revive slightly older treats by popping one in the microwave for exactly 5 seconds. This softens the marshmallow binding just enough to restore that chewy, decadent mouthfeel.
Creating the Perfect Spread: What to Serve Alongside These Bars
These Oreo Rice Krispie Treats are the perfect “finishing touch” to a hearty family meal. If you’ve just served a savory, comforting dish like our French Onion Chicken Orzo Casserole, these treats provide the sweet contrast your palate craves. Their ease of preparation also makes them a great companion for outdoor gatherings where you might be serving Cowboy Coleslaw.
If you’re hosting a seasonal dessert swap, these bars look stunning on a platter next to our Brown Butter Pumpkin Chocolate Chip Cookies. For those who prefer a savory-and-sweet lunch, try pairing a smaller square with a Garlic Bread Grilled Cheese for the ultimate comfort food experience.
Frequently Asked Questions About Oreo Marshmallow Treats
Yes! Double Stuf Oreos work great and add a bit more creaminess to the bars. However, keep the quantity the same (about 20 cookies) to maintain the structural integrity of the bars.
No, refrigeration is actually the enemy of a soft Rice Krispie treat. Let them set on the counter at room temperature. This keeps the marshmallow binding soft and pliable.
The secret is using a parchment paper sling and letting the bars set completely at room temperature. Use a sharp chef’s knife coated with a tiny bit of butter or flavorless oil to slice straight down without sawing.
When stored in an airtight container at room temperature, these Oreo Rice Krispie Treats will stay fresh and soft for 3 to 4 days.
Treats usually turn hard because the marshmallows were melted over too high a heat, causing the sugar to crystallize. Always melt marshmallows on the lowest heat possible and remove from heat the moment they are smooth.
Recipe: The Best Oreo Rice Krispie Treats Ever
Oreo Rice Krispie Treats: The Ultimate No-Bake Cookies and Cream Bars
Ingredients
Equipment
Method
- Line a 9x9 inch baking pan with parchment paper, leaving an overhang for easy removal.
- In a large pot over low heat, melt the butter. Add the 10oz of marshmallows and salt, stirring until completely smooth and glossy.
- Remove from heat and stir in the vanilla extract.
- Quickly fold in the rice cereal and chopped Oreos until well coated.
- Add the extra 2 cups of whole mini marshmallows and fold briefly so they remain intact.
- Gently transfer to the pan. Press down lightly (do not pack). Top with mini Oreos and more mini marshmallows while still warm.
Notes
Use a greased knife for perfectly clean cuts.

The Ultimate Cookies and Cream Experience
Mastering the Oreo Rice Krispie Treats is a rite of passage for any home baker looking to elevate the classics. By following our “double marshmallow” technique and using the thick-cut 9×9 method, you ensure a result that is as visually stunning as it is delicious. These treats are guaranteed to disappear quickly at your next party or family gathering.
Did you try this recipe? We would love to see your “perfectly square” results! Leave a comment below, and don’t forget to share your creations and follow us on Pinterest for more culinary inspiration and visual recipe blueprints.